By Rob Manley
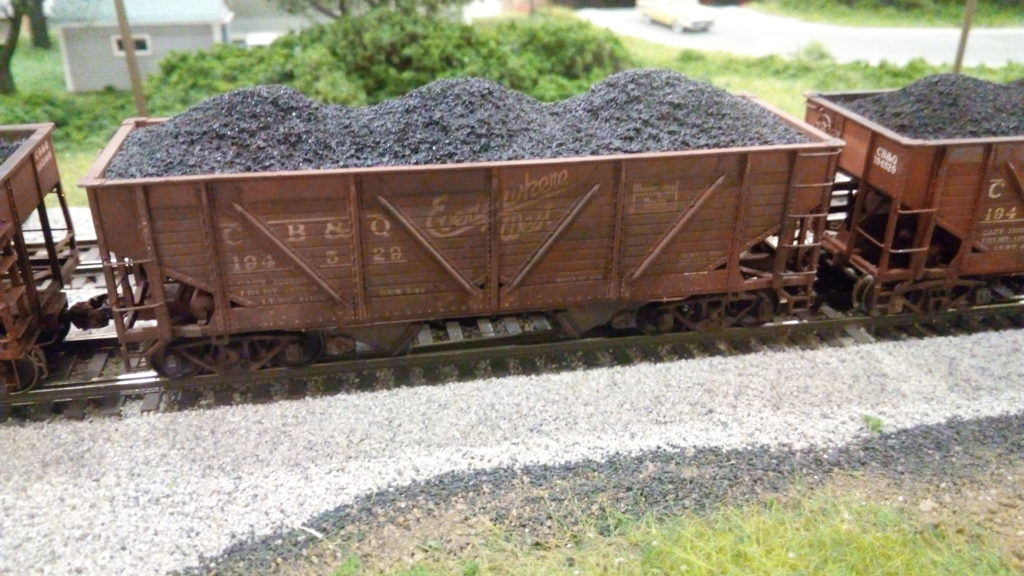
Part of the fun in building models for me is the research. Oh sure, you can easily build a kit straight from the box, follow the box art to position your decals and still have fun. What I’m talking about is “more funner”( this was from a young girl watching my weathering demo).
Funner for me is pouring through my acquired data to find that “right” photo in order to model the subject as accurately as possible. Weathering is definitely one of those facets. I’m sure you can build a kit and weather it as realistically as possible by using your imagination and creativity. That’s one of the elements that separates a good model from a great model. Having that extra dimension of accuracy is what makes the model truly a work of art. Well that’s my opinion.
In order to make a detailed model unique and an exact representation of reality I have turned to building resin cast models. Unlike plastic models that may represent a type of generic car, these kits are exact. They’re usually more detailed and require a higher level of skills and tools. I was a fan of these kits but I felt I lacked the necessary skills to build one of these masterpieces. I did buy a few kits in hopes that I would improve and eventually finish some of these cars one day.
SPOILER ALERT: I did.

One of the first steps I took in my skill building was to build some Tichy brand plastic freight car kits. They are highly accurate and although more difficult than an Athearn blue box or an Accurail kit the Tichy kits have a fit and exactness that allows them to practically fall together. The difference is that they are a multi media kit. They are mostly made of injection plastic but also have pre-formed brass grab irons and brass rod that needs to be cut to length. They do have a printed template for the rod length and shape. Its easily cut and bent to size. The attachment of the metal parts to plastic is done by using ACC glue and tweezers. This is very similar to a resin build. The big difference between plastic and resin is that there is a little more work to separate the part from a thin carrier sheet by sanding the back or cutting it out and sanding to shape. I use a nail file-board that I buy from Walgreens. It has 4 distinct colors visually separating 4 different grits. The heavier grit is for removing large amounts of unwanted resin, the fine and extra fine are used for shaping, final finishing or removing scratches and gouges. Anything requiring a finer grit would be best done with automotive grade 800 or higher sand paper. I’ve also found some sanding blocks at the higher end cosmetic stores.


The plastic kits sometimes have holes cast for applying the wire parts. Some of the holes will need to be opened up with a larger drill bit. If the instructions call for a #80, I’ll go up to a #78. The larger hole will fill up with ACC and the larger bit is stronger and less able to break off. This also allows for a little “wiggle room” to help straighten the grab irons. The resin kits do not have predrilled holes for attachment but rather, have dimples cast in place. Using a high-power magnifier or goggles would be a must. Invest in a pair of Opti-Visors or reading glasses

On the Funaro and Camerlengo kit shown you can see there is a conical dimple next to a rounded rivet. This is where I use a spotting to tool (see the sharpened point above) to make a deeper impression in the substrate. It helps keep the drill from wandering away from the desired location. A suggestion would be a compass point or a map tack. The dimple allows you to place your micro drill into the depression to get an accurate start on the hole. I use a General brand hand drill. It has 4 collets to accommodate different sized bits.
Here is where PanPastel steps forward and takes its place as an essential modelling tool. Most of the assembly and detailing is done prior to painting. Working on the white resin, clear resin and gray resin kits can be a bit of an optical struggle. The light color resins can be difficult to see attachment points and details that visually align, let’s say, a car side to an end casting. The spotted indentations for drilling a hole are also a challenge on a snowy white casting.

Below is the drill bit locating the spotted point. NOTE: drill at a right angle unless you need an offset angle hole.


PanPastel Colors can be cleaned off if a change is needed. It can then be made fully permanent by sealing with a flat finish. I use PanPastel Colors and a Sofft Tool to lightly add a darker color, like PanPastel Red Iron Oxide Shade (380.3), to the general work area. It highlights all the details and makes the difference between a rivet and a hole spotting point more obvious. When done, you will wash the model in soapy Dawn (or similar) and water to remove finger oils and any slippery mold release from the model. Shout is another detergent stain remover that I use to remove slippery mold release compound from my kits. This is an essential process for resin or styrene models. Rinse and let dry before and after assembly and final paint.
I hope you find this additional use of PanPastel useful.
See you in the Chicago area Railroad Prototype Modeler show in October with a clinic and Hands On workshop.

See you soon with another post. (Thanks, Bev for letting me get a new computer.)
About Rob Manley – For more information on Prototype Modeler Rob Manley visit this page.
