Category: Uncategorized

People are People

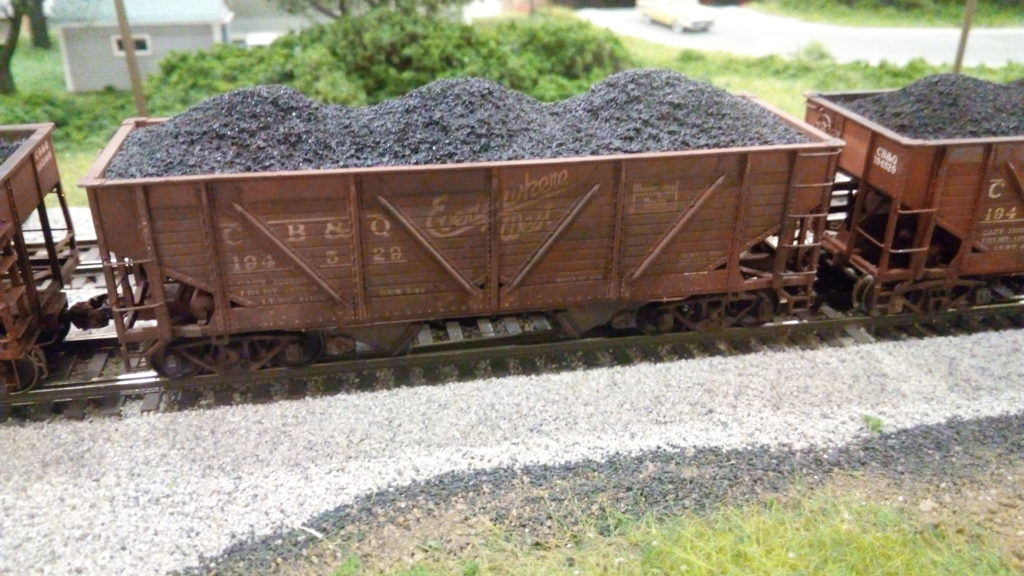
Lately I’ve noticed a change in the model railroading world. There are more and more models available as ready to run. Which means that more models are detailed the same, painted the same and look the same. This doesn’t do anything for individuality or personal statements in modeling. Weathering is a great way to make that out of the box model truly yours. You are making an artistic statement in addition to adding your unique stamp of ownership.

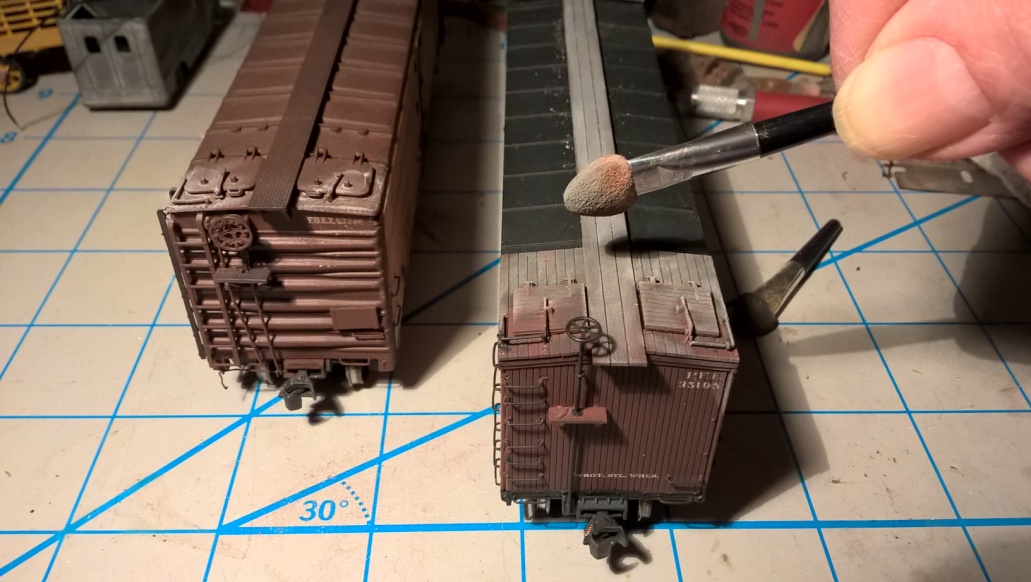
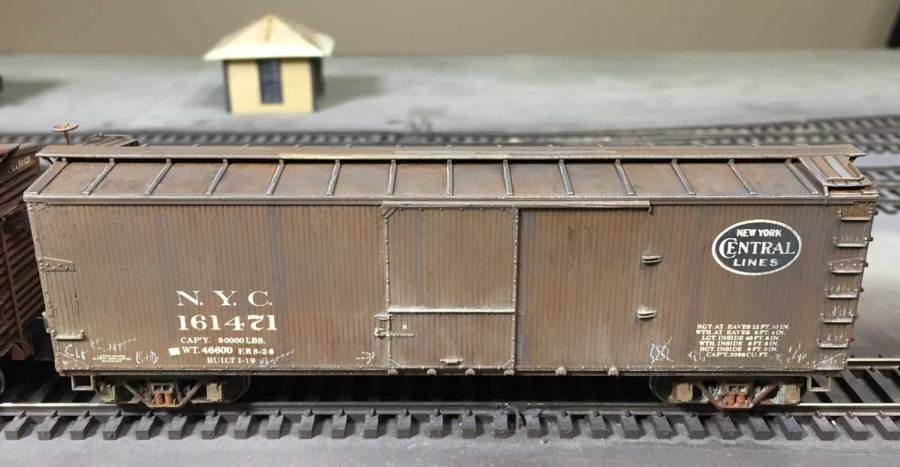
I have frequently heard the statement “This model cost $250.00, I’m not going to risk ruining it with weathering”. This could be a valid point if weathering was irreversible like airbrushing or the use of oil or acrylic paint. Fortunately we know that with PanPastel unless you seal the weathering with a matte overspray, it is removable with soap and water. I have removed the acrylic Flat Finish on a model about 15 minutes after applying with a spray of Shout and a soft tooth brush. Traces may be left but it is minimal and depends on the color of the model and the color of PanPastel. I’ve removed the 10 year old acrylic airbrush weathering on a Yellow Muncie and Western boxcar using a Mister Clean dry Scrub pad. The color that was left was in the scribed siding indentations and areas near ladders and grab irons where I couldn’t reach. Just remember to spray another coat of flat finish before applying the PanPastel.

Above: The right side is previously airbrushed overkill, the left is now clean enough to re-weather with PanPastel.

Getting back to the subject, some of the model passenger cars are available with paying customers. Pre-painted figures glued to their seats and ready to begin their journey. Populating your streets, benches and work zones has, as long as I can remember, been easy with pre-painted figures from the likes of Preiser, Woodland Scenics, Campbell and others. This too is a good thing. I was once told at a train show that my 1950s module of 55th and Halsted in Chicago, “was nice but didn’t have enough people doin’ stuff”. Well there is that school of thought that says, “Less is More”. That means every seat in a passenger car does not need to be filled. The human eye fills in the blanks and seeing something is better than nothing, the brain fills in the rest. Besides even one of my Aero Train coaches, which is the size of a bus, would cost around $50 plus to fill. Not where my hobby dollars want to go these days.

These pre-painted figures have either nicely sculpted facial and clothing details or not. They are mostly painted in a color called “Flesh”. It’s a light Peach color that only represents a part of the population. Really, it doesn’t even look like my skin tone which is that of a pale Irishman. Whatever it is, when seen through the windows of a model coach, looks all the same pale, anemic and ghostly color. The detail on the figures doesn’t match that of the coach, bus or auto. Even department store mannequins look better.

Lately I have been paying attention to our military modeling brothers and sisters on Facebook. Some of them pay incredible attention to detailing their figures. They use shading techniques with underpainting, dry brushing, and washes of color. Their figures match the skill level of their vehicles. Of course, they do work in much larger scales than we railroad modelers but there are some lessons to be learned from them.

The problem with me and most of you is that I have more than one passenger train. Actually six. OK, one is a coach in a mail train but I do have a 1952 California Zephyr of 13 cars. How am I going to populate these cars and make the folks look realistic?

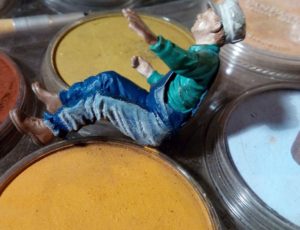
Well, this is what I came up with. Preiser makes sets of unpainted seated figures and are more affordable than the pre-painted ones that average about $3 each. YIKES! As you can see, I paint the seated people while they are still on the plastic molding tree. I start by using a plastic lid or bottle top as an artist palate and lay down a generous dot of different colors. Red, Blue, White, Brown, Green and Grey to name a few. I try to stretch my colors out by using a bottle color like B&O Blue for suit coats, jeans and hats on varying figures. I also put a few drops of white and black to add to the bottle color so I can vary the tones.

Think about Blue Jeans, they’re not all the same dark shade of Indigo. Some will fade to a Medium Blue or a Light Blue. I’ll then pick a second color and so on. There are plenty of color images from your time period that you can use. One of my Burlington Route travel brochures has a watercolor rendering of a populated dome car that I would like to copy. The men are all in suits. Make it fun. If you model recent Amtrak, put some people in pajamas or sweat suits.


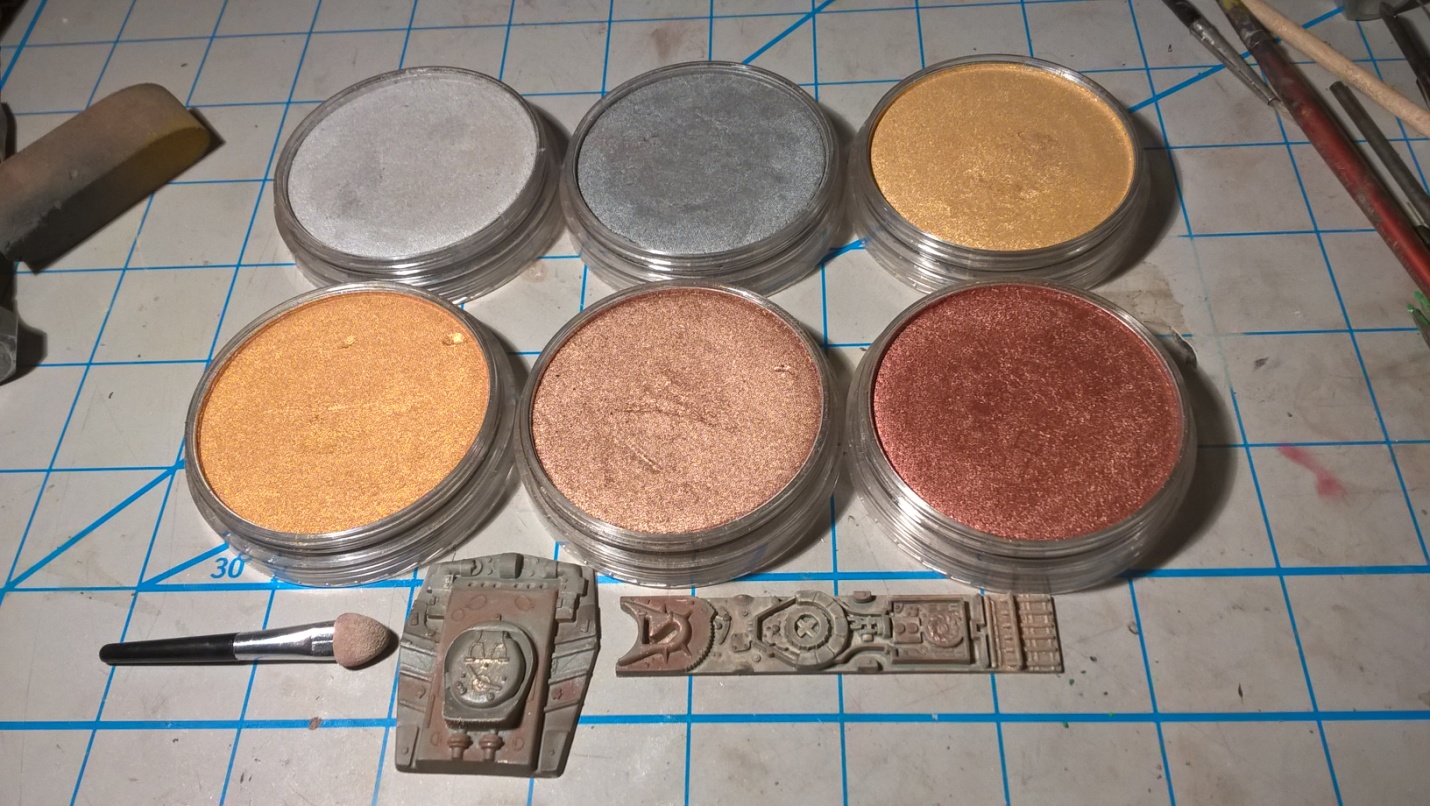
Here is the PanPastel part of the article, now that the paint has dried on the figures:

REMEMBER: When applying PanPastel over a painted figure – use a FLAT finish paint which gives some “grab” to hold the color in place.  An overspray of Flat may be needed first, AS SOME FLAT COLORS AND ACRYLICS HAVE A SHEEN WHEN HAND BRUSHED.

Using the small Micro Brushes, wipe the faces, with a PanPastel Burnt Sienna 740.5. Work it into the details and character lines of the face and hands. Take a clean Sofft Tool and wipe the excess off the high spots of the face and hands. Notice how the details look more like shadows. If needed you can gently wipe a Sofft Tool of a flesh color back over the faces to add more highlights. You can even use other colors or Paynes Grey Tint 840.7 to highlight the folds in the clothing.

You shouldn’t have to do too much work as only the face and shoulders can be seen through the windows. You may also want to add a lighter shade Orange Tint 280.8 to help cheeks pop a little.

Touch up the tops of the heads after you cut the figures from the sprues, I like the 4 color nail boards from the Walgreens cosmetic department to remove flash and the casting gates on the heads. Next glue them in their reserved seats. I use a flexible white craft glue by Aileen’s in the gold bottle. It’s great because it dries clear and won’t fog windows like an ACC will. I even use it to attach windows and etched parts like diesel grills and running boards.

So I hope you enjoy trying this new use of PanPastel. If you are concerned about the cost of adding people to your trains just model a freight train with the engineer, fireman and conductor or early Amtrak. Much shorter trains and much fewer passengers than the transitional era heyday.

I’ll talk at you soon. Stay well.

Rob Manley

Seeing is Believing

By Rob Manley

Part of the fun in building models for me is the research. Oh sure, you can easily build a kit straight from the box, follow the box art to position your decals and still have fun. What I’m talking about is “more funner”( this was from a young girl watching my weathering demo).

Funner for me is pouring through my acquired data to find that “right” photo in order to model the subject as accurately as possible. Weathering is definitely one of those facets. I’m sure you can build a kit and weather it as realistically as possible by using your imagination and creativity. That’s one of the elements that separates a good model from a great model. Having that extra dimension of accuracy is what makes the model truly a work of art. Well that’s my opinion. 

In order to make a detailed model unique and an exact representation of reality I have turned to building resin cast models. Unlike plastic models that may represent a type of generic car, these kits are exact. They’re usually more detailed and require a higher level of skills and tools. I was a fan of these kits but I felt I lacked the necessary skills to build one of these masterpieces. I did buy a few kits in hopes that I would improve and eventually finish some of these cars one day. 

SPOILER ALERT: I did. 

Read more

Thorsten Ströver Weathering Article

Thorsten Ströver’s article in the April 2017 issue of German magazine Eisenbahn Kurier features PanPastel for weathering. The 6 page article shows many of the techniques that Thorsten uses with PanPastel. Even if you don’t speak German, the images speak for themselves and showcase the realistic weathering effects that Thorsten was able to successfully achieve.

Note: for readers of US magazine “Model Railroader” – Thorsten is featured in the Trackside Gallery in the August 2017 issue.

Read more

Using White Pearl Mediums

Pearl WHITE Pan Group
Here are some simple techniques for using the new PanPastel Pearl Medium White (Fine) 011:

C:\Documents and Settings\Owner\My Documents\3_PanPastel_Weathering_Article\BLOG\SPARKLE_PEWTER BLOG\Reefer_PaynesGray.jpg

Apply PanPastel Neutral Grey 820.5 with Sofft Mini Applicator to represent weathered wood running board and hatches.

WP_20160217_21_35_55_Pro.jpg

PanPastel Neutral Grey 820.5 on wood running boards and platforms. Orange sides of reefer faded with Yellow Ochre Shade 270.3.

Simulate ice and brine damage on upper corner and drain above truck and wheels using Pearl Medium White Fine 011.

Other uses for White Pearl Fine and Coarse would be white caps on marine dioramas, waterfronts and rivers. I have a small diorama my wife, Bev, built for her covered bridge model. I plan on adding “water” to the creek and using the Pearl White Fine and Coarse 012 to create waves or foam on the top of the water. I’ll cover this in detail when I show you, in a future post, how to use PanPastel® for scenery construction.

~ Rob Manley

Showcase – Jeremey Janzen

SP cab forward 4292 was weathered starting with initial washes of Testors enamel paints followed by PanPastel Colors.   

20160724_113649

View from the Fireman’s side of 4292 as it awaits servicing

20160724_150758

 4292 on the turntable

20160724_150832

Front of 4292

20160724_150927

Roof shot of 4292

20160724_151022

4292 leaving the turntable

Photos were taken at an engine facility modeled by James Lynch, Jr   My website is http://www.janzenfamilytrains.com/


Structures

I really haven’t covered structures in my blogs. They are, in my opinion, one of the most important elements in model railroading. They are the setting for the trains we detail and weather. One of my favorite structures in the railroad realm is the country grain elevator. I have a nice collection of 35mm slides that I took starting in the seventies. I am sure many of these “Country Skyscrapers” are now gone. One of the best ways we can recapture those memories is by building a model of them. The model I chose for this portion is the Walthers® corrugated elevator. I primed it with a Light Grey acrylic. Originally meant to be weathered with washes, I procrastinated long enough to discover PanPastel® and use them instead. I am so glad that happened.

DSCF5089.JPG

Weathered with Sofft Sponge Bar and random colors from the PanPastel Rust & Earth set.

Step 1. I started by using my Sofft® Sponge Bar by scrubbing on an overall covering of Burnt Sienna 740.5 and Burnt Sienna Shade 740.3. You have to really push the color into the corrugated grooves. The overall effect is to have the rust in the recesses and the high spots to be slightly polished by the wind. I then used random swipes of Burnt Sienna Tint 740.8, Raw Umber Tint 780.8, Red Iron Oxide Extra Dark 380.1, to name a few. Honestly, I work so fast I barely remember what colors I used. If an area looks too heavily colored I will keep brushing it down with one of my Sofft® Sponge Bars. If I want to tone it down further, I use the PanPastel Colorless Blender 010 as seen on the roof panel. The Colorless Blender will soon become one of your most used “Un-Colors”. It can also be used as a primer for lighter colors.

WP_20160217_21_52_21_Pro.jpg

Step 2. Next any stray excess color was blown off and a paper towel was used to lightly wipe the excess on the raised corrugations. This allowed the Pewter 921.5 and Silver 920.5 to accent the high spots as in real life. I then used the flat spongy side of the block to add the final overlay of Silver. This side took less than 5 minutes. Structures are not handled like rolling stock so a flat finish (spray) is rarely needed.

Elevator_BrushingSilver

Step 3. Add silver and Pewter to tops of corrugations.

Well, as always, it’s been fun sharing more techniques with you. I have more projects in mind to post about in the near future. ~ Rob Manley

Using Metallic Colors & Giveaway

WP_20160217_22_03_16_Pro.jpg

“All That Glitters”

I’ve had these PanPastel® Metallic Colors for a while and I always thought they looked pretty cool. Lots of potential. A little hard to write about. I guess it is because they are more subtle than the other colors we use in weathering our models. Now, I didn’t make an immediate reference to my obsession with freight car modeling. By models I mean the plastic kits that most of us started with like Revell planes, Monogram cars and Sci-fi kits.

There are 6 PanPastel Metallic Colors:

910.5 Light Gold
911.5 Rich Gold
920.5 Silver
921.5 Pewter
930.5 Bronze
931.5 Copper

The colors have some interesting properties; they can add highlights to a model that add that “human” touch. A realistic sign that miniature folks left their mark on the model. Metal can show signs of rust, mud and dirt; it can also show signs of wear. Paint fails down to the metal when rubbed or gouged. This can be easily simulated with the swipe of a Sofft Tool®.

Let’s talk about the Silver and Pewter first. In a previous post I described the weathering of exposed galvanized sheet metal on boxcar roofs. The technique can also be used for structure roofs, corrugated sides like grain elevators, truck or trailer cargo areas.

Read more

Modeling is Real with Fade Away

DSCF4893

We are going to cover a much talked about subject, fading.  This is the effect of the sun on real prototype paint which causes the color to change to a lighter shade or in some cases “pink out”.

Soot and dirt will make some colors go much darker, in the case of the Burlington’s 1958 chinese red boxcars that look almost boxcar brown when viewed in the late 70’s. This I know because it’s the railroad I model and I have a color chip painted with the exact formula of Dupont ®paint. The cars I saw were in a scrap line at Chicago’s Metron Steel almost 30 years ago with my friend Dave Sarther and his son Davie.  I couldn’t believe the overall change in its hue when we hiked up to their boxcar purgatory. I picked a sharp rock and scraped a patch on the side of the car and amazingly the familiar orangey-red color appeared.  This type of fade would be simulated with a wipe of PanPastel®  740.3 Burnt Sienna Shade.

DSCF4832

The Cast and Crew of this post…

Equipment painted in the transition era had a mostly lead composition and took quite a while to fade. Locomotives and freight cars painted starting in the late 60’s were required to use a paint or coating using less or no lead. This gave us a different chemical change due to the elements. The colors were also much brighter and varied. Remember the 70’s? My Mom’s house had a fridge that was two-tone brown and around the corner, red and gold foil wall paper in the hall. Those brighter colors like Rock Island Material Service Red, Light (aka. Bankruptcy) Blue, Railbox Yellow, Conrail Blue and BN Green gave us a much wider palette to work with and they faded into some interesting pastel shades. Hey we’re working with PanPastel so this should be easy.

Recently in the model world much of the available rolling stock is now pre-painted and built up.  The manufacturers give us nice paint jobs most of the time but for purists there is room for correction. So for example, I have a group of Burlington open hoppers that are painted Boxcar Red. The actual cars were painted in Mineral Red which had a redder or more orangey tone. I was happy, at the time, to weather them with my airbrush and hope I didn’t notice. Years later with PanPastel in my life, I found  380.3 Red Iron Oxide Shade that looked much closer to the color I wanted. Unlike an airbrush, PanPastel with a small Sofft Tool can get right up to the white lettering without obscuring or covering it.

Read more