Author: Weathering Techniques

Rust

By Rob Manley

“Rust Never Sleeps” It’s better to burn out than it is to rust….
The baby boomer covered hopper edition.
I thought it would be appropriate to borrow an album title from Neil Young. He is a model railroader and a fine musician. Music means a lot to me and I have very intense feelings about it. My favorite radio station is Chicago’s WXRT which plays progressive Rock and has been since the early ‘70s. During a recent “Panic Modeling” attack the week before the “All American Model Railroad Show” in Lagrange Illinois, I had the stereo tuned to 93.1 FM. It was also more convenient than loading up a bunch of CDs. Speaking of convenience, I was in fact weathering with my PanPastel® on the dining room table.

DINING_Table

Hard at work on the dining room table, scrubbing with 90% Isopropyl alcohol and paper towel.

These cars were previously painted, decaled and weathered by another modeler. I used 90% Ispopropyl alcohol, small squares of paper towel and Q-Tips® to scrub the previous wet brush style weathering off. This stripped off some of the Dullcoat and gave a mottled and faded look to the paint. We’re going to re-coat the model with a Model Masters flat finish to prepare for the PanPastel®. (For more about using flat finishes read this post: Preparing to Weather

Some of the paint was enhanced with more PanPastel® Paynes Grey Tint 840.8 (a close enough match). This filled in areas that were damaged during the cleaning. It’s also a method to introduce fading paint to your weathering repertorie. We’ll cover this in more detail in a later blog.

BEFORE_TABR

Before cleaning.

Clean_Tabr

Cleaning with Alcohol and a cotton swab. I feel like the art restoration people. There is some decal blush visible because the decals were applied directly to flat paint. They should always be applied to a glossy finish and flatted later.

AFTR_TABR

After cleaning with the color addition and correction of Paynes Grey Tint 840.8
_________________________________________________________

Our topic of discussion today is rust. It’s a really broad subject and I am going to cover as much as possible in this space.

Read more

Preparing to Weather – Flat Finishes

By Rob Manley

I had a great time at the Amherst Model Train Show back in January this year. I gave a PanPastel® weathering clinic to a full house on Friday and did demos at the PanPastel table for the rest of the weekend. It’s always great to meet the modelers that use PanPastel and those who are interested in trying. The word is definitely out and there are some great examples of really high-end modeling by using PanPastel. What I have to remember is that the product has as much appeal for the novice as for the more experienced user too.

I’ve been using PanPastel since 2009 and sometimes I forget about those starting out in the hobby. So after some soul searching (I should have looked in the back of my sock drawer) we are going back to the beginning…

So why do we modelers weather our stuff? Well in a word, realism. It is also another way to put our personal mark on our models in a hobby that is becoming more “ready to run”. Models have become straight from the box, contest winners, with all the prototype details correctly installed and painted. Some of the time anyway. Weathering is also a great way to hide flaws too.

I saw some great layouts at the show but on some of them I did notice was that the motive power (and most of the train) looked like it rolled from the paint booth. Yep, no weathering. Right from the box and on the rails. So why, does this happen? Well I’m glad I asked that question. Modelers I met at the show who don’t weather gave me some of the answers.

  1. “I can’t weather.”
  2. “I don’t have an airbrush.”
  3. “I’m afraid of wrecking my expensive model.”

All, extremely, valid, points. Well, here are my answers:

To #3 – You can not wreck it with PanPastel because it can be removed/corrected easily.

To #2 – You don’t need an airbrush.

And to #1, that’s OK ‘cause I’ll teach you how I weather.

PanPastel is a great product with an amazing limitless number of uses. It’s easy too. There is really no down side to it as it lasts a really long time. Read more

Tints, Shades & Extra Darks Explained

Pans - Tints to Extra Dark BURNT SIENNA

The PanPastel Color range includes tints, shades, extra darks and pure colors.

Sometimes we are asked what is the difference between our tints, shades and extra darks. So here is a brief explanation:

PURE COLORS
PanPastel pure colors refer to colors with pure pigment which have not been mixed with black or white.
740 =Color No. 740.5 = Pure Color

TINTS
Tints are the pure colors mixed with white.
220.8 =Tint (Pure Color + White)

SHADES
Shades are the pure color mixed with black.
220.3 = Shade (Pure Color + Black)

EXTRA DARK
Extra darks are created by mixing more black (more than the shade) to the pure color, to create intensely rich and dark colors
220.1= Extra Dark (Pure Color + More Black)

The pre-mixed tints/shades offer modelers ready to use, consistently mixed, tints, shades, and extra darks. However as all the colors can be mixed it is also very easy to blend custom colors also.

The reference numbers we use for each color, as well as the color name indicates which type of color it is. Summary of color references:

740 =Color Reference No.
740.5 = Pure Color (Masstone)
740.7/.8 =Tint (Pure Color + White)*
740.3 = Shade (Pure Color + Black)
740.1/.2= Extra Dark (Pure Color + More Black)**

Note: All greys except 840.1 are mixed with white.
*Neutral Grey 820.8 is lighter than 820.7 (i.e. more white).
**Neutral Grey 820.1 is darker than 820.2 (i.e. more black).
For information on our weathering colors visit ModelingColors.com
Contact your local hobby store to order these new items.

Degrees of Weathering

“It depends.” My zen-like graphic arts teacher once gave our class the universal answer to everything. That phrase even works on the job and in relationships. It especially works in modeling. The question often posed to me is,” How much should I weather my model?”

“It depends.”

Well what it depends on can be categorized into: time, place and occupation. It has been well written that your model can be like an actor on the stage. When seen, he or she should look and act the part in order to be convincing. After all that’s why that amazing detailing is cast into the model. So one purpose of weathering should be to bring out that detail. Sometimes I’ll use PanPastel to highlight some details on an added part like a brake wheel just to make it pop. You know, more visible. Military modelers use dry-brushing of a white or lighter color on the edges of surfaces just to bring out the highlighting of the sun. The more than 90 colors of PanPastel are great for this too. Think about it. A Yellow or Orange refrigerator car can have highlights of a lighter shade of that color to show the same effect. The sun will fade a color and this is a great way to show variation in a wood side or just tone down the brightness of a freshly painted model.

PP_ReeferDS_V2

The traditional eras of railroad modeling are Early Steam or pre-Depression, Steam Era generally 1930 to 1950, Baby Boomer 1960 to 1980 and The Modern era which takes in a very broad range. The Steam Era is defined by lead based paint on wood cars which weather differently than a modern steel car with a non-lead base paint and let’s not forget graffiti. Like it or not it’s there and does get modeled. Modern cars generally rust more heavily than earlier periods of time.

Read more

Weathering “Up on the Roof”

This is my Birthday Blog and I celebrated it by doing a clinic for the Rock River Valley Division NMRA in Rockford, IL on the 2nd of November. That was the day after my birthday and a great excuse to see some excellent model railroads. I’ve been raising some spending money lately by selling off my excess 1/25th car model kits. In a rare moment of weakness I decided to focus my efforts on the railroad. So with that in mind let’s focus on a specific type of weathering project. Beat generation writer Jack Kerouac once said, ”I love boxcars and I love to read the names on them like Missouri Pacific, Great Northern, Rock Island Line.”

So we’ll go with that.

I’m going to start with the roof and that applies to boxcars, stock cars and refrigerator cars. The car that started it all with me and PanPastel® was a Central Valley® Northern Pacific stockcar kit that I had built, painted and decaled. It had existed for years in it’s Oxide Red paint job until I found an image of one that was in the background of a freight yard photo in a Morning Sun® color book. The car had a galvanized roof and various shades of gray weathered side slats. To duplicate this would not be the usual airbrush a spray of a misty brown color.

Let’s get started

This required a radically different approach. To simulate a galvanized roof I like to brush paint various shades of Acrylic Polyscale® light gray, like EL or Milwaukee Road Gray onto the surface. Use recycled lids from margarine tubs and such for a mixing pallet. Put a few drops of different colors on the lid with a few drops of water and pull a little of each color onto a number 2 watercolor or acrylic brush. The different shades are painted on the roof and drawn from under the running board to the roof edge if you have attached the running board. It’s much easier to paint and weather in sub-assemblies leaving the running boards or ladders off until final finishing. This will give you a good base for galvanized roof.

OLYMPUS DIGITAL CAMERA

Brush painted PrimerGray roof, roof seam caps Roof Brown. Weathering and running boards PanPastel® Paynes Gray and Tint plus Burnt Sienna highlights

Read more

New Product – Pearl Black Mediums

Pearl Mediums Pan Group No Logo

NEW! PanPastel Pearl Medium – Black  Use these on their own or mix and blend them with the original PanPastel Colors to create shimmering darks and shades. Available in fine and coarse.

FINE – Contains smaller particles to create a soft and subtle sheen.
COARSE – Contains larger particles to create a more shimmering sparkle.

The pearl mediums will add a sheen / shimmer which changes depending on the angle it is viewed from, this also creates dimension.

Try them to add realistic sparkle and sheen to coal loads, as well as coke and iron ore, in hoppers and tenders.

Black & White Marks Coarse & Fine with captions sml

Contact your local hobby store to order these new items.
For more info write to us at: info@modelingcolors.com

Introduction – Rob Manley

DSC06468

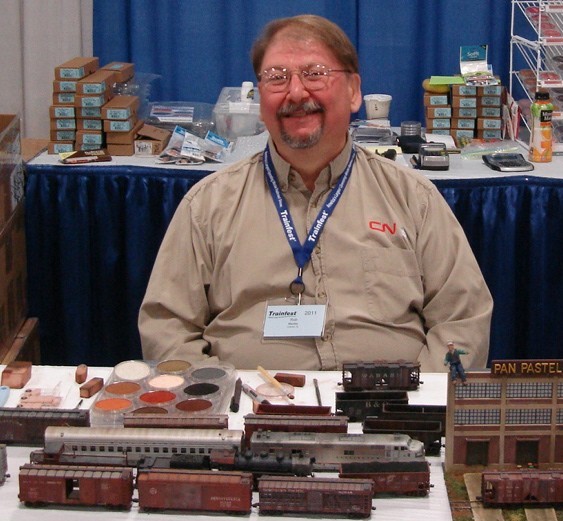
This is the beginning of the PanPastel® Weathering Techniques blog. I have to start somewhere so this is a short introduction – I am Rob Manley and I have been building models for most of my life. Since I read my first article in the sixties by model railroader, John Allen, I have been fascinated by the art of weathering. I always preferred a nicely weathered model over one that was freshly painted. When I was about 10 or so I remember seeing a model of a 1936 Ford that was rendered as a rusty junk yard wreck diorama at Trost Hobby Shop in Chicago. I talked about it for days.

I guess I really didn’t start to weather until I bought my first Paasche® airbrush in the 70s. Some of it was subtle like adding some dark brown to a black to show aging on a locomotive frame or freight car under-frame. At that time I was using lacquers or oil based enamels and got nice fine spray patterns from my single action brush. I also used washes of paint and thinner to highlight shadow areas. All was well. Most everybody I knew used an airbrush and I was happy. My trains looked appropriately aged and not like out of the box. Some of the modelers in the hobby press were using other materials found in art stores. I was an art student at the time and frequented these stores. The sepia tones and other colors of chalk that they were using looked like an easy way to vary my style. I experimented a little but the airbrush won out as a universal appliance. Chalks looked cool but were fragile and vanished with the application of a protective overspray.

Well after I married and found out my wife had allergies, I decided to switch to acrylic water based paints. My paint booth is in the basement near the furnace and we didn’t like the strong smell of lacquer throughout the house. I noticed the disadvantage of acrylics is that I had to use a larger spray tip to get the paint through the airbrush. I also increased the pressure from my compressor to compensate the difficult nature of the paint. Acrylics can have a tendency to dry in the airbrush as you are using it, enamels and lacquers tend to have a self cleaning nature and spray in a finer pattern.

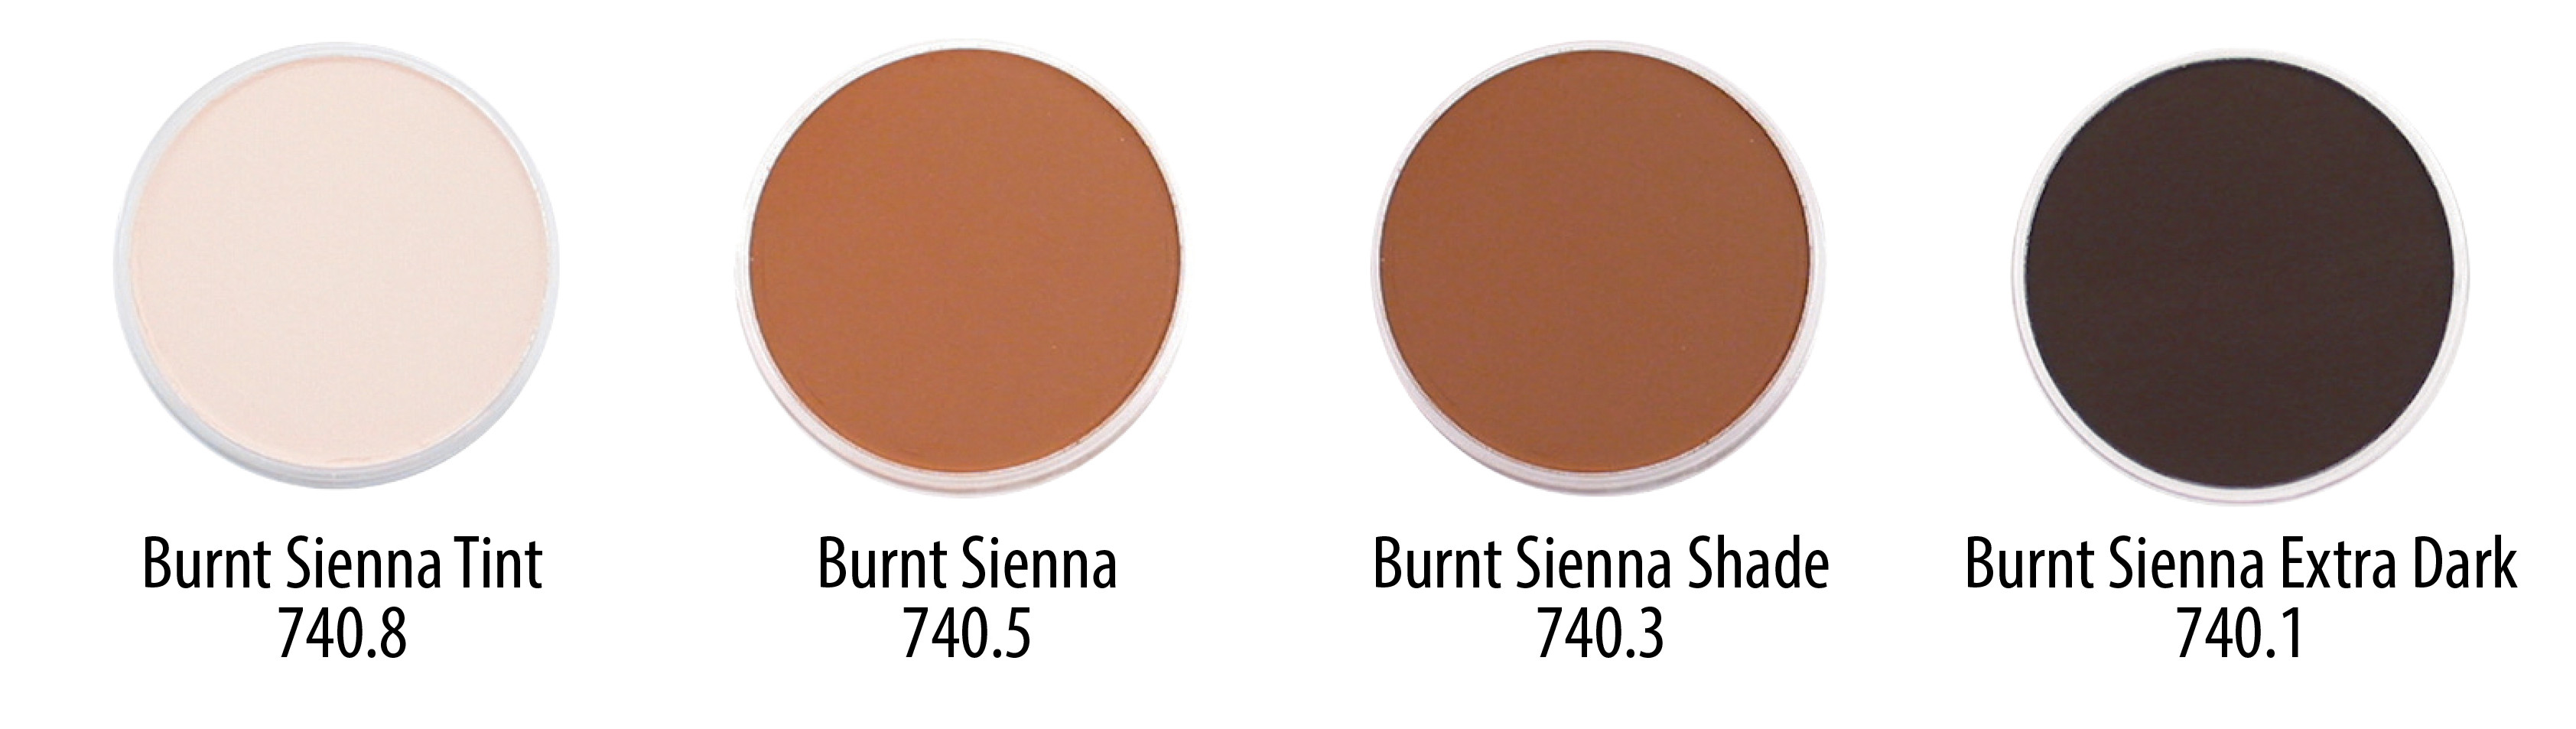
I started to become unhappy with airbrush weathering. I saw a demonstration using alternate methods and materials at the Railroad Prototype Modelers meet in Naperville, Illinois. They were using water-based oils and weathering powders to achieve a highly realistic treatment. I decided it was time to head to the art store to see what I could buy and use on my models. My wife and I went to Dick Blick to buy some colored pencils to restock her collection and I wandered into the chalk and pastel aisles. This is how PanPastel entered my life. There was a full collection of these neat looking clear circular containers with lots of awesome rusty earth tones and multiple shades of gray. I thought that this PanPastel had some real potential so I bought an Iron Oxide Red with a few Sofft® Tools to try at home. That’s all she’d buy me.

 OLYMPUS DIGITAL CAMERA

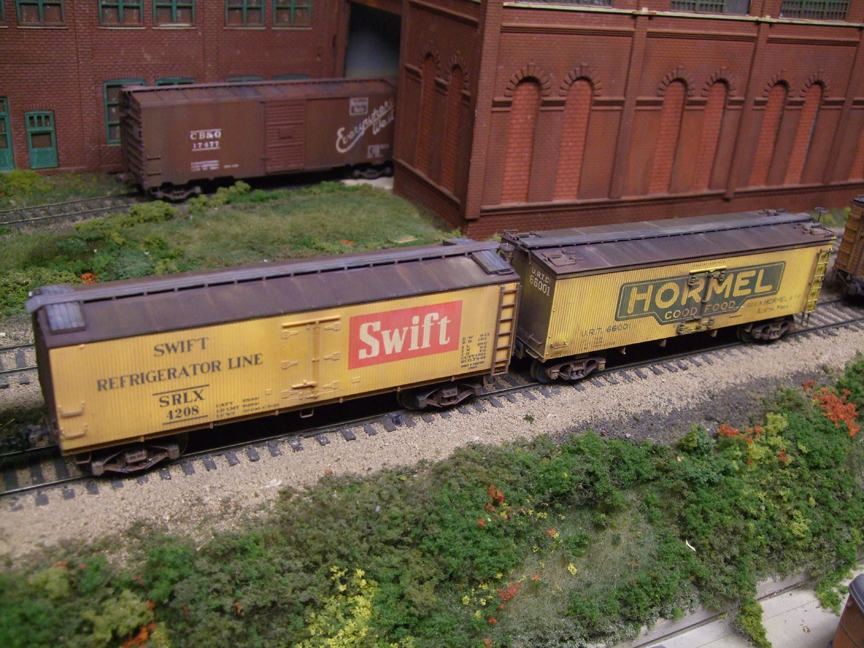
Some of my first experiments with PanPastel

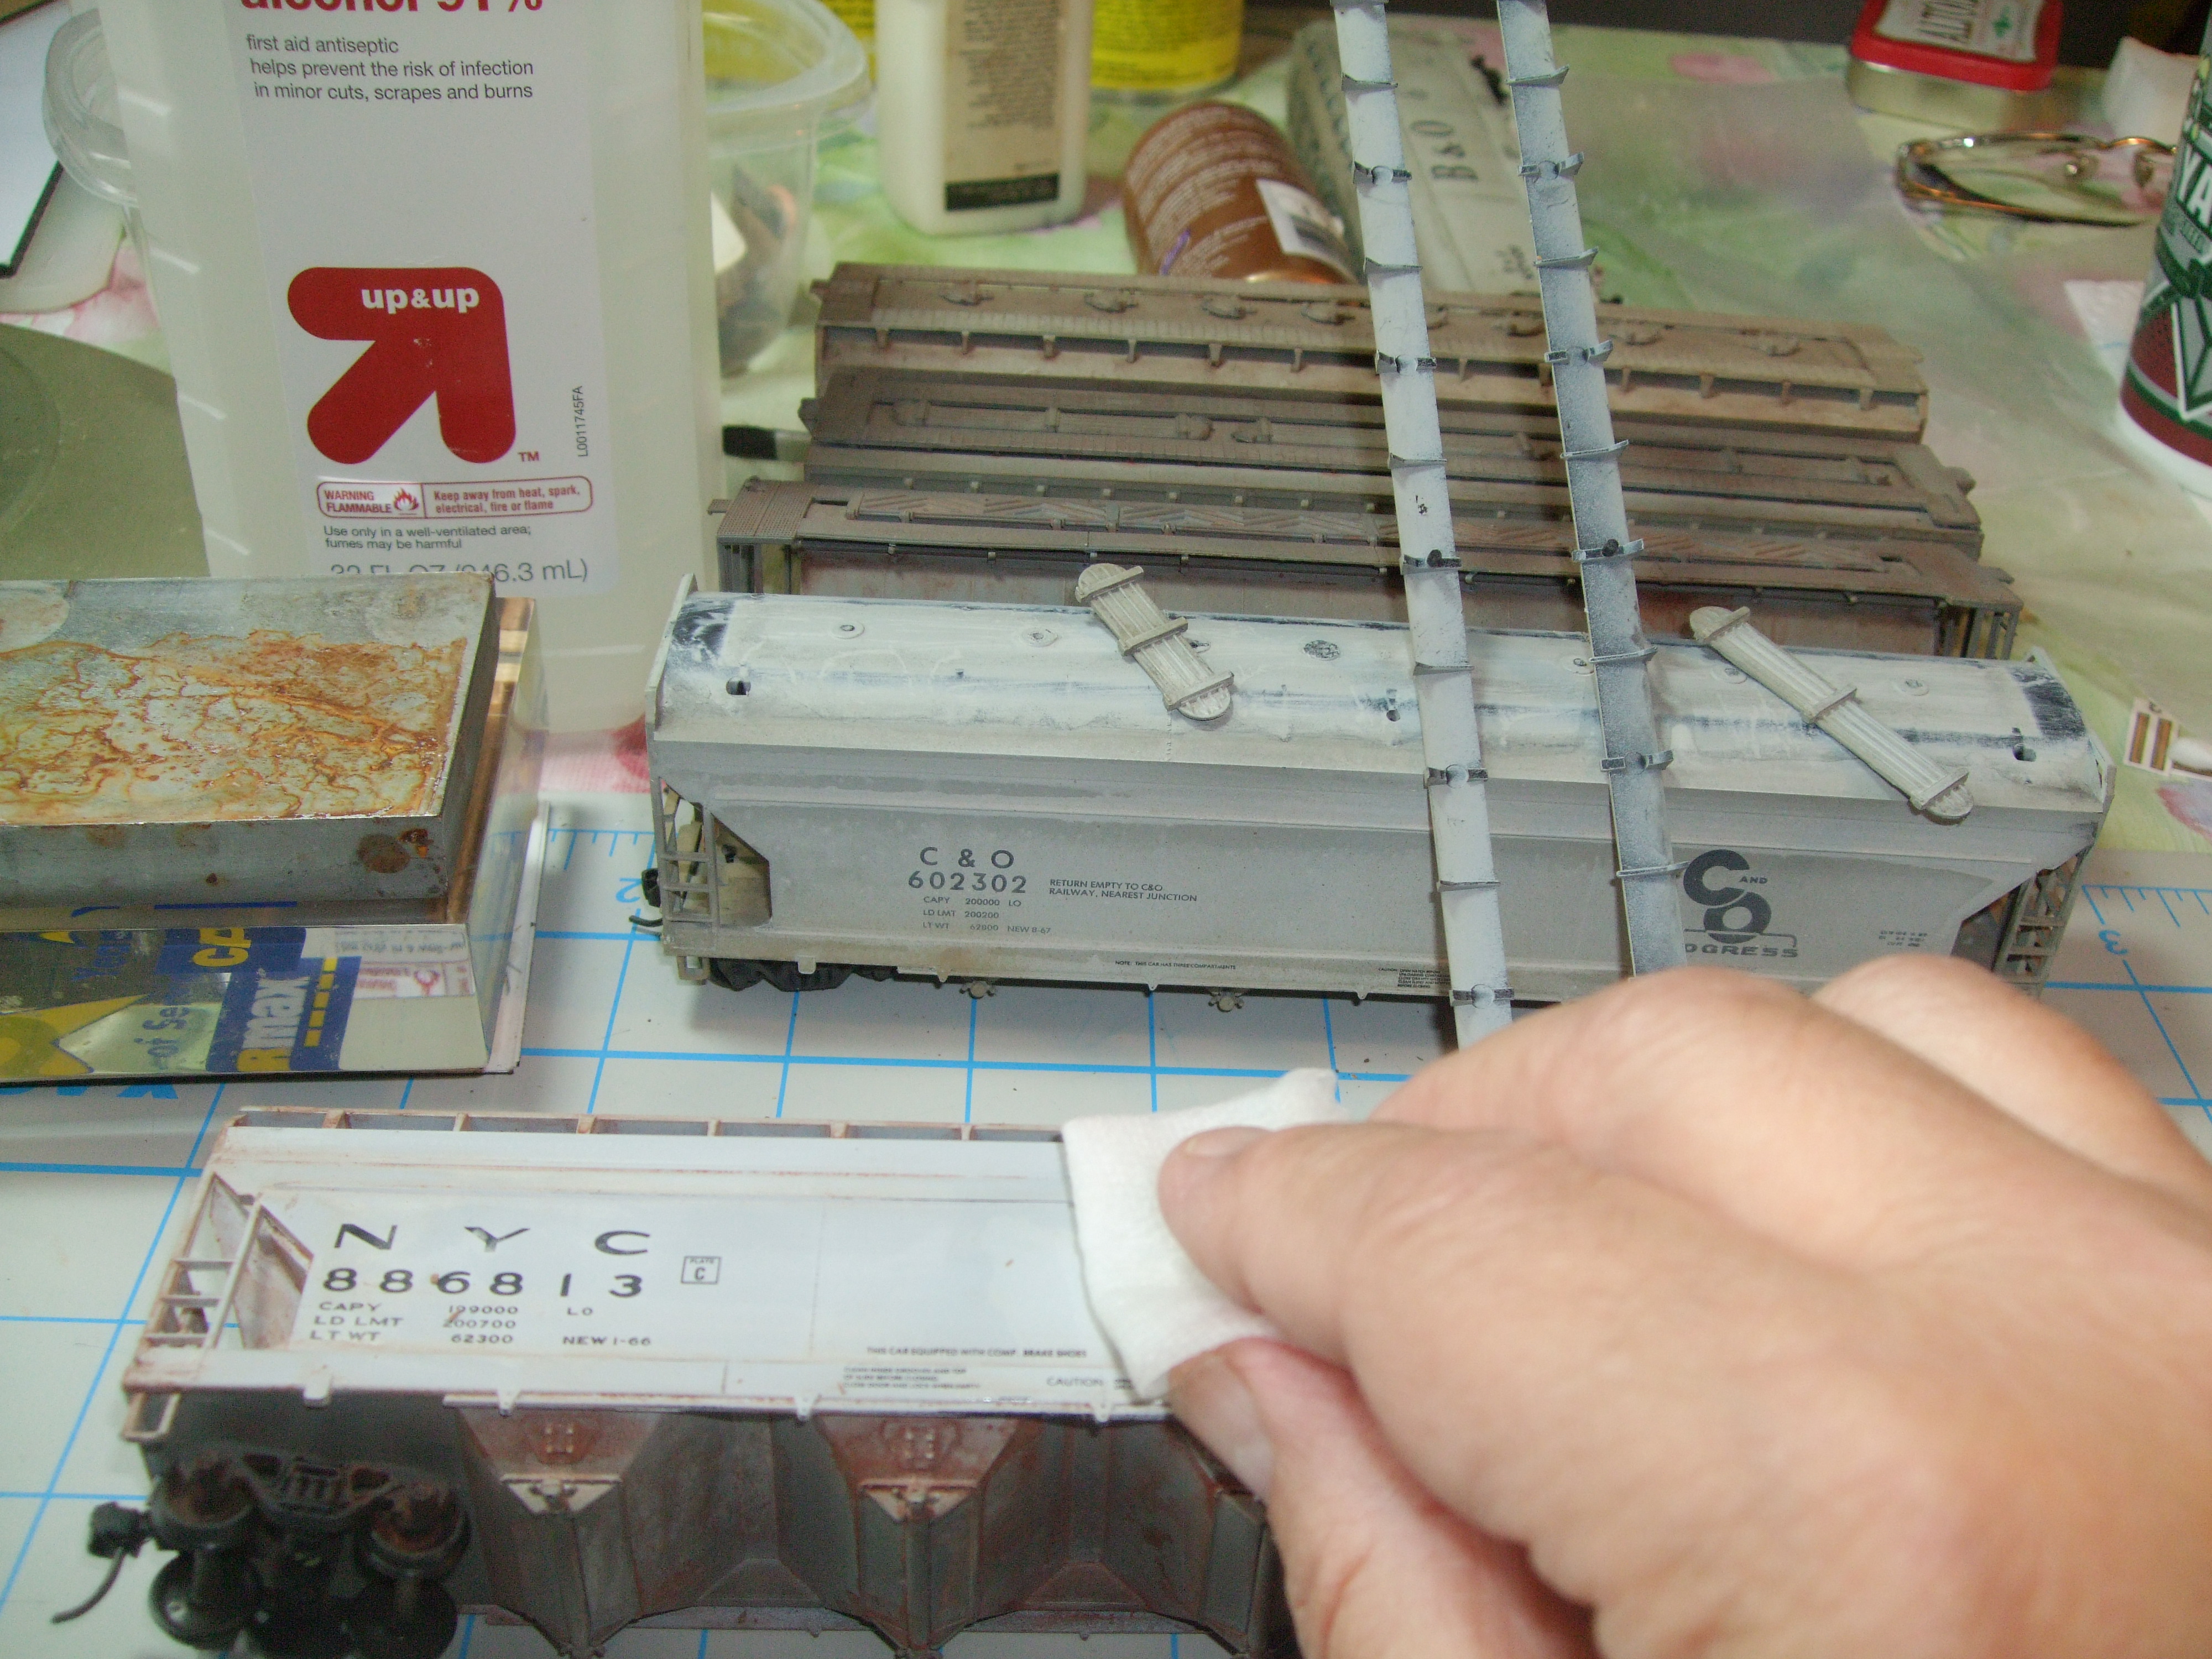
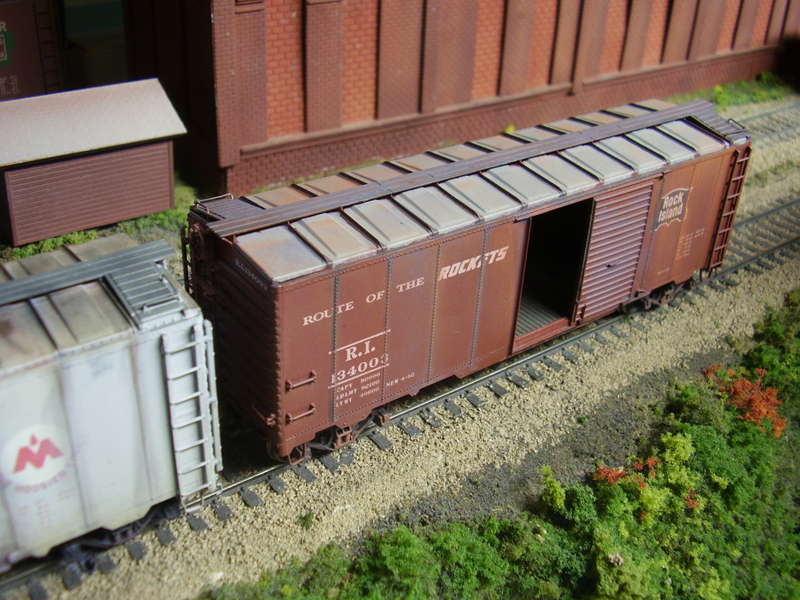
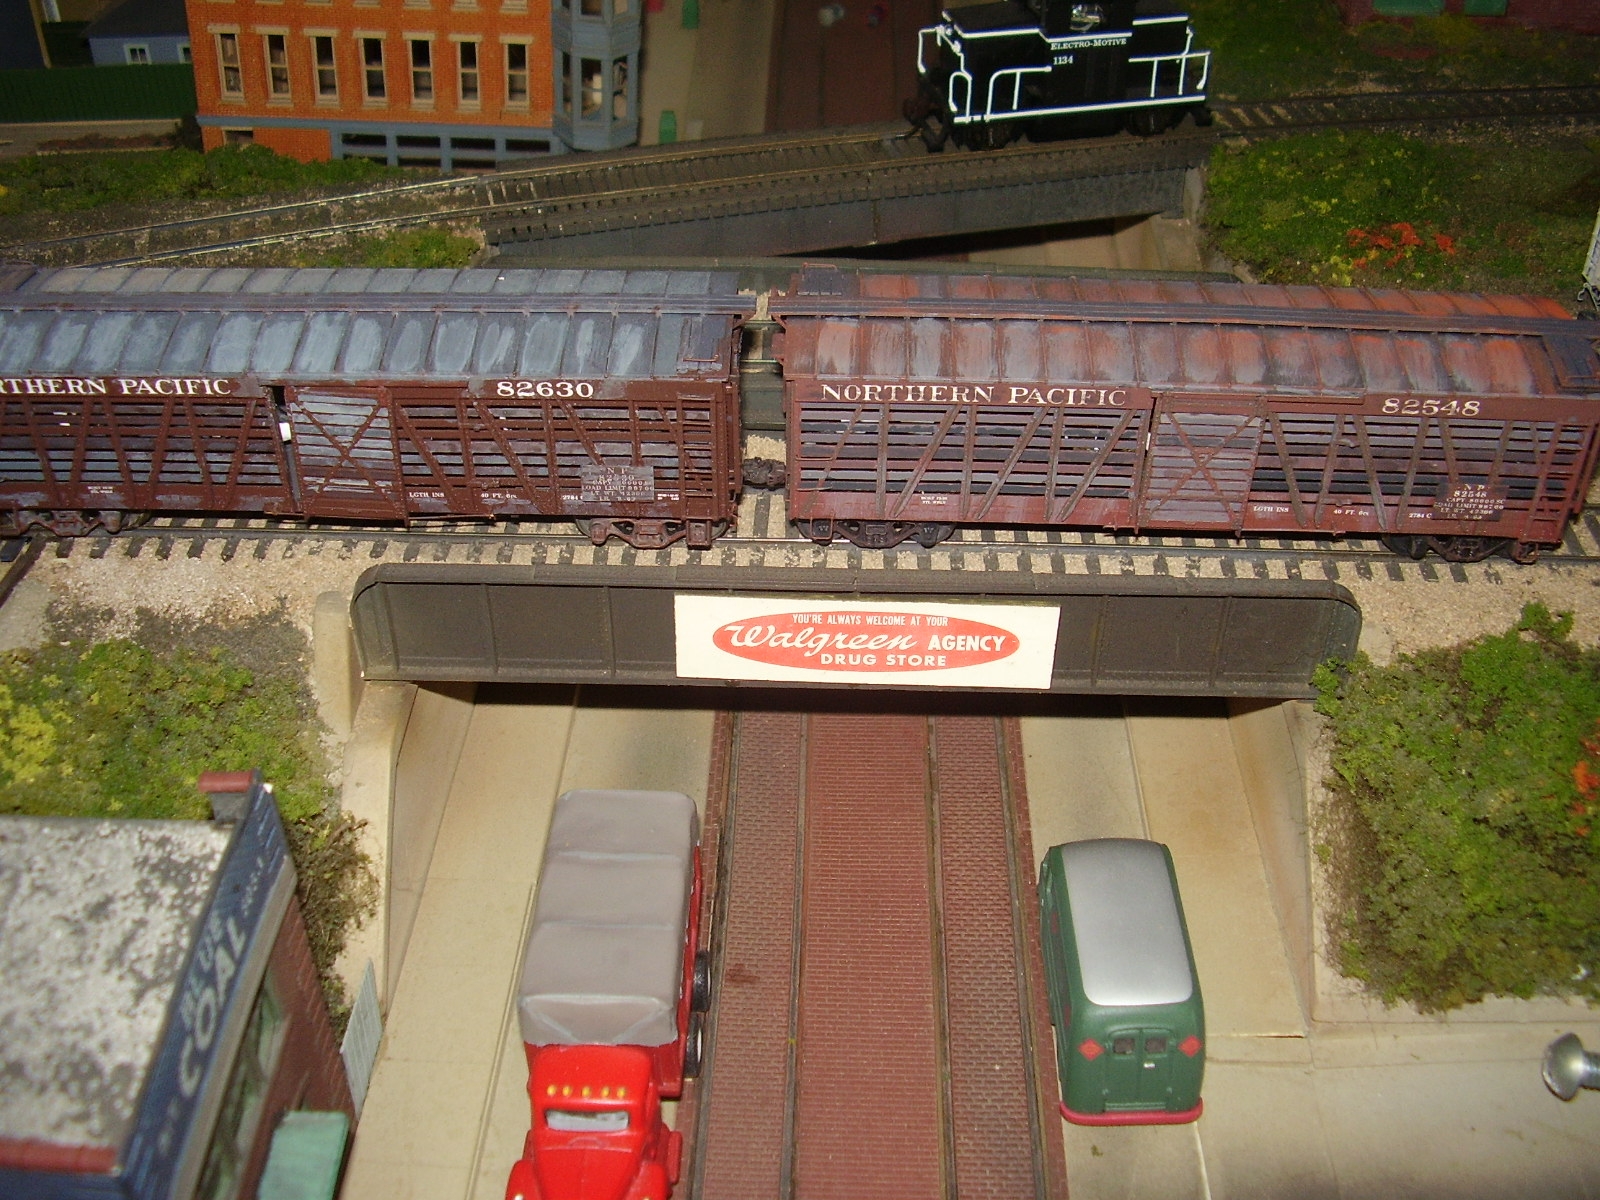
I wiped the Sofft Tool across the pan and found a willing stock car model to experiment on. I had tried to simulate aged galvanized steel by wet brushing 2 shades of gray onto the roof of the car. It looked a lot better than a monochrome roof and sides. I wiped the foam applicator across the roof and was blown away with the results. It picked up the panel lines of the casting and left a subtle hue of rust color across the panels. Eureka! For a first attempt, I was impressed. I experimented with the durability and found it stayed on the roof very well. My models are run on a modular railroad so they are handled more than on a home layout. The weathering needs to be protected so I mixed up a small batch of flat finish and sprayed it on the roof. After it dried I checked for color loss like the chalks had given me. There was very little. I continued to experiment and eventually acquired a 10 color Drawing Set with Browns, Grays and a nice sooty Black. I re-weathered and corrected some previously done freight cars. I eventually built and painted some contest quality kits that were entirely done with PanPastel.

Weathering your models with PanPastel can be very simple and rewarding. You can reproduce highly realistic effects in little time and with a small learning curve. There are no expensive tools or machinery to buy and it is affordable and durable. We will explore the basics as well as advanced techniques and explain them that will make them simple and fun. I will answer your questions too.

I have given a few clinics and demonstrations and have quite a collection of feedback from other modelers both novices and experienced. So let us begin our journey.

PanPastel is firstly a professional grade artist’s medium. There are now 92 colors (as well as 5 mediums) that are named according to the artist’s pigments used and not named as “Rust” or “Grimey Black”. We’ll figure colors and many specific details of techniques in more detail in future posts.

Let’s talk about preparation first.

PanPastel was originally developed for artists, so it is normally used on paper with a non glossy finish. It is rubbed into the micro hills and valleys of the texture of the paper. The more texture the better it sticks. Our models are made of plastic and usually painted. It was found that models photographed better with a fat finish. It is generally accepted that our work has a dull or flat over coating to seal decals or to prevent unrealistic glare. Here it comes. However, not all models come with a flat finish. Some are eggshell or semi-gloss, besides not being entirely realistic, do not work well with PanPastel. I have weathered models on their “out of the box” finish but only in the heat of battle like demonstrating at trade shows when someone asks me to weather their Climax locomotive for lunch.

Blog_1_Flat_CoatSo what flat finishes work best with PanPastel?

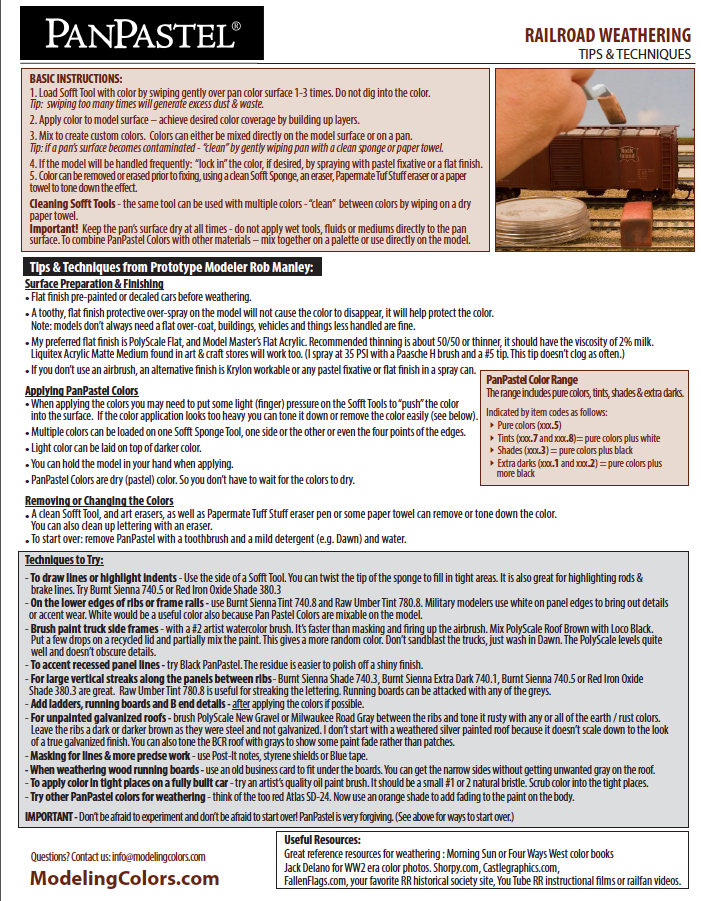
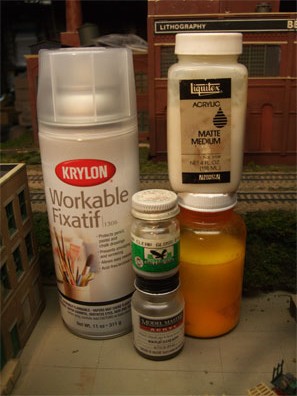
My airbrushing favorites lately have been: PolyScale Acrylic Flat, this may be in short supply as the parent company has chosen to consolidate all their acrylic model paints to the “Model Master’s” line. Model Master’s Flat is superb. It gives a nice dead flat base for the pastels to grab on to. When sprayed on a test piece of Plexiglas it does not seem to tint the base color. For my spraying I usually cut this a little more than 50/50 with water. The rule of thumb for diluting paint for the airbrush is for it to have the consistency of 2% milk. My Paasche H series brush uses a #2 tip with 35 pounds of pressure and a not too close distance from the surface. About 6 inches so you have a dryer spray. It shouldn’t be a wet finish as it may tend to gloss up a bit. This is where you should experiment on a scrap car.

If you are using solvent based paints Scale Coat® makes an excellent flat finish. I have models I painted entirely with Scalecoat® 30 years ago that only now are starting to show glossy parts from handling. Some modelers who do not have an airbrush like to use Testors Dullcoat® in the rattle can. I haven’t used it in years as it ruined a set of diesels by changing the color from ghost white to cream. I imagine some day, I’ll break down and get a can for the sake of the blog and objectivity. If you need to use a rattle can, I have used Krylon® Flat Workable Fixative. It comes in a tall spray can and is what most artists use to protect their pastel art work on paper. This is available from most art stores. Speaking of which. I used heavily diluted (2% milk rule) Liquitex® Acrylic Matte Medium in my airbrush for a G scale refrigerator car.

So now you know what to use for a base flat and why to use it. How do you apply PanPastel? This may seem extremely fundamental but it needs to be told after watching modelers use it for the first time.

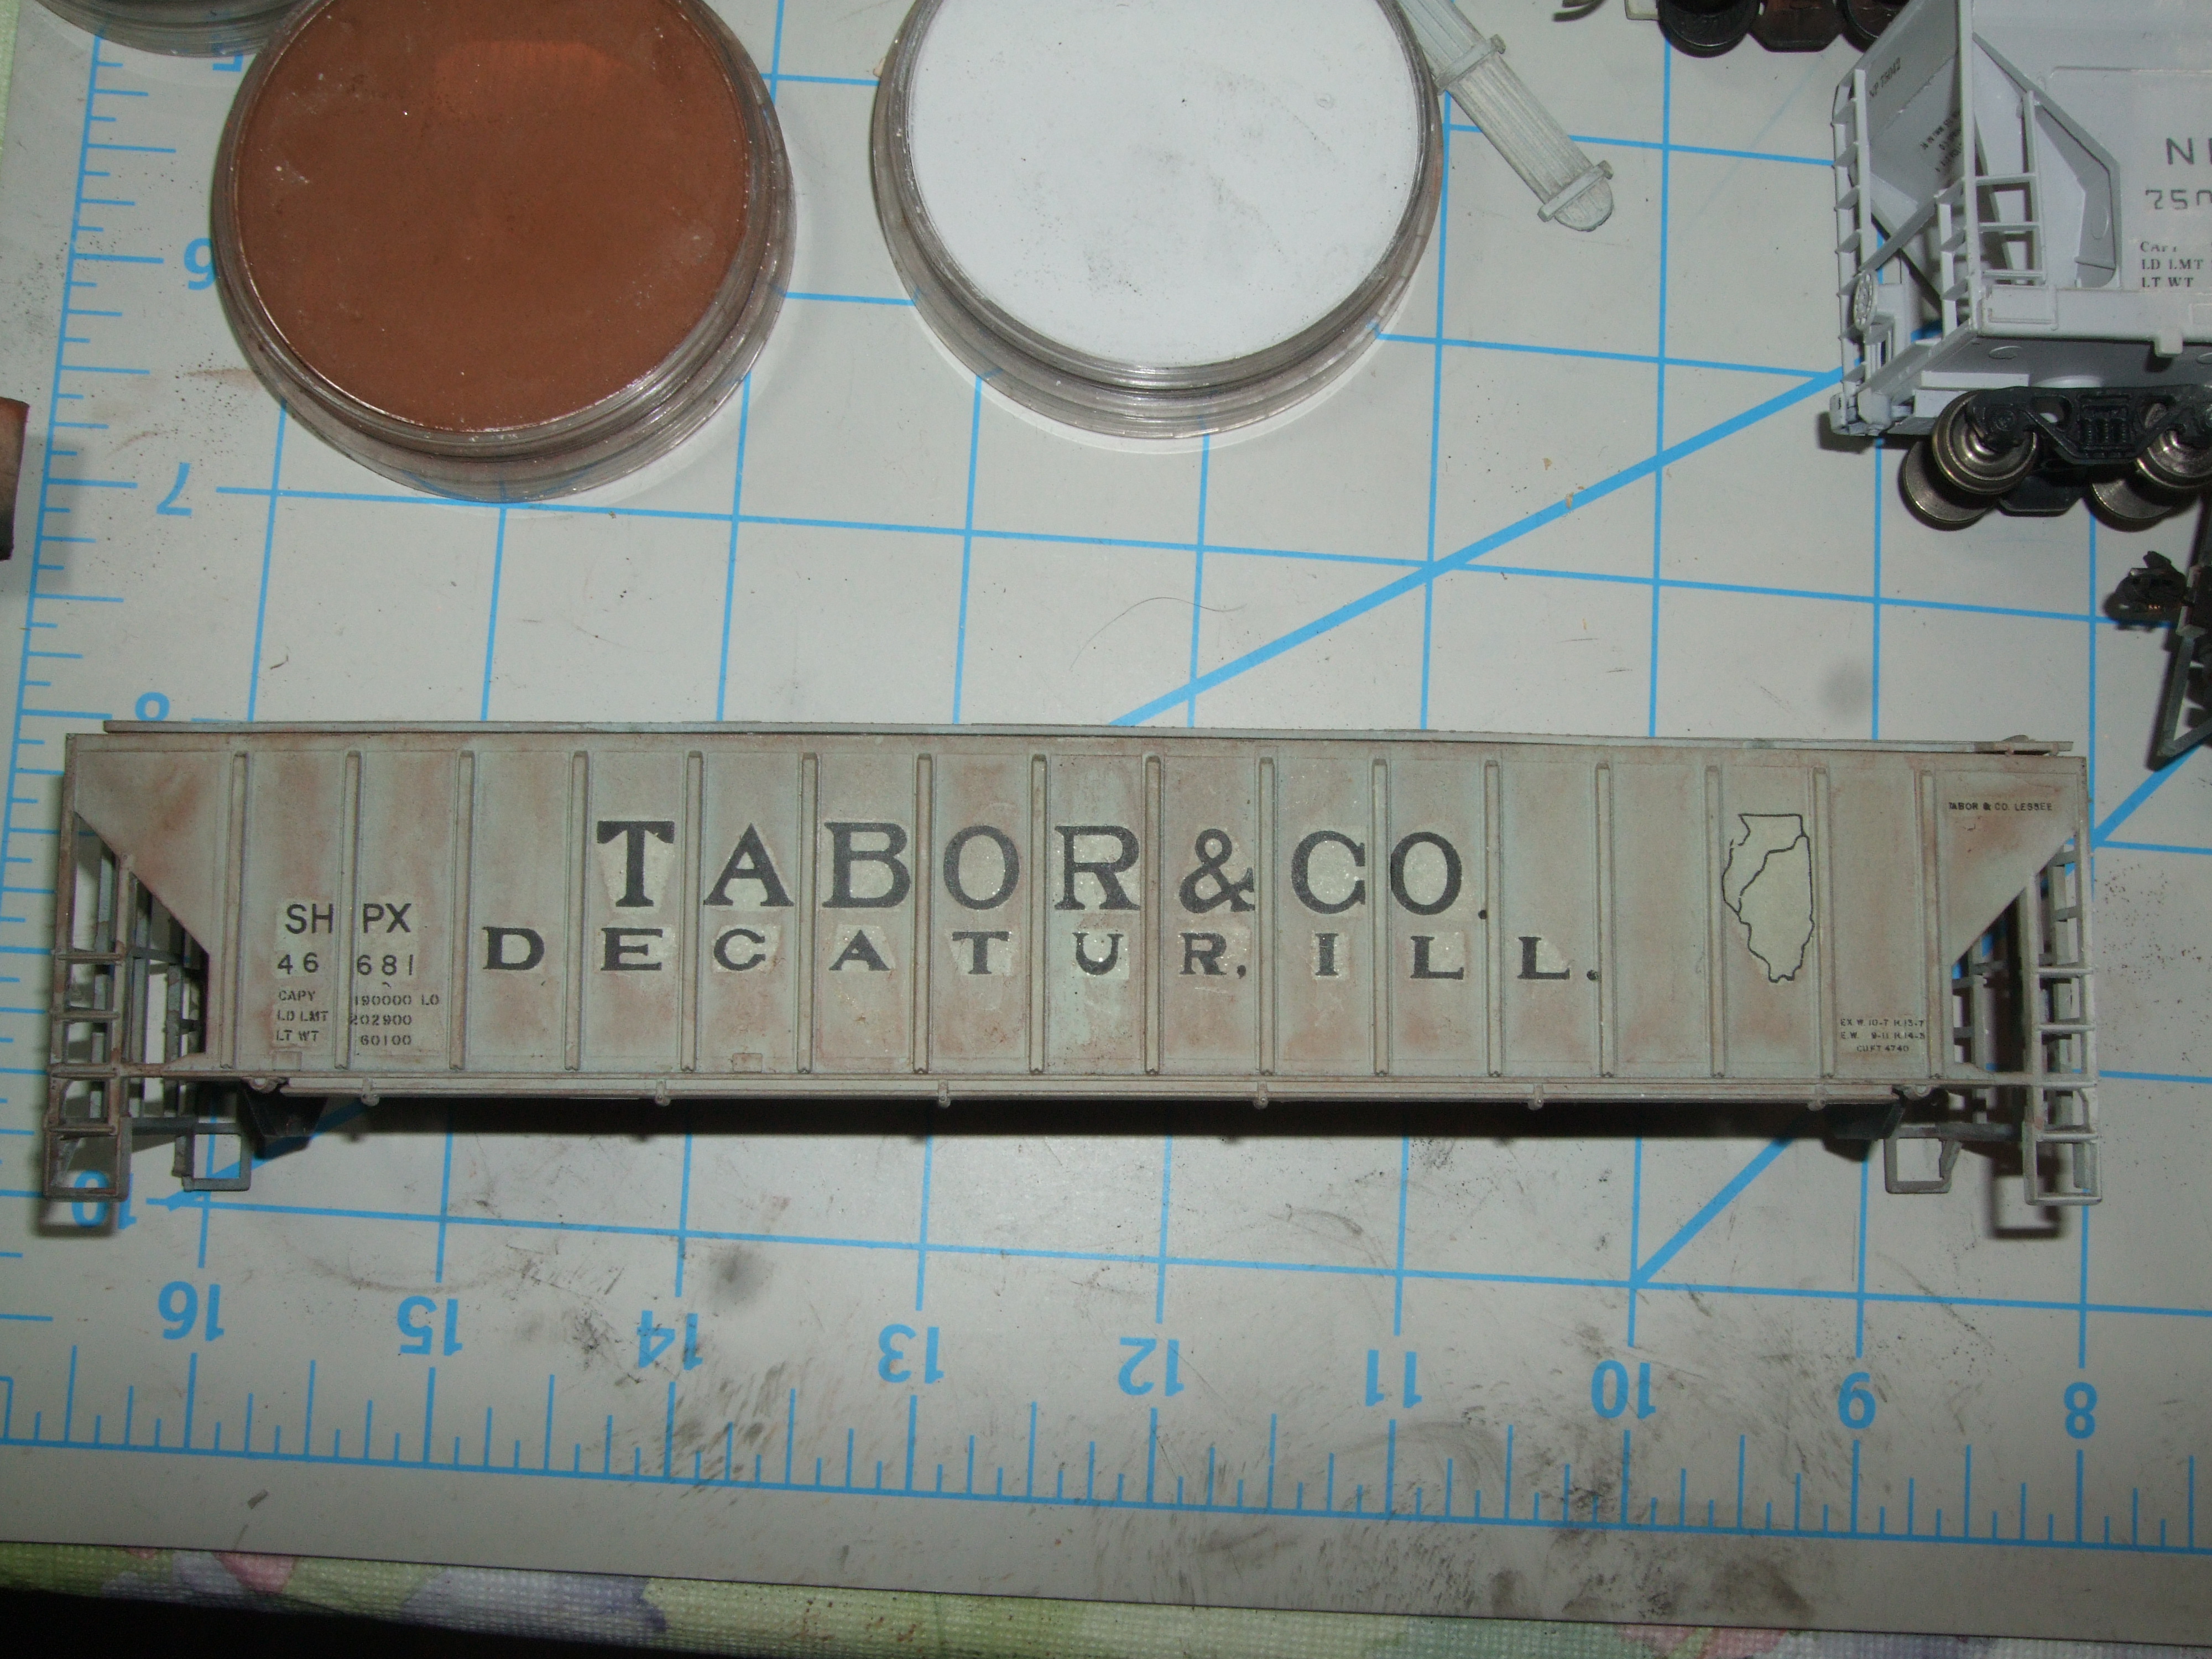
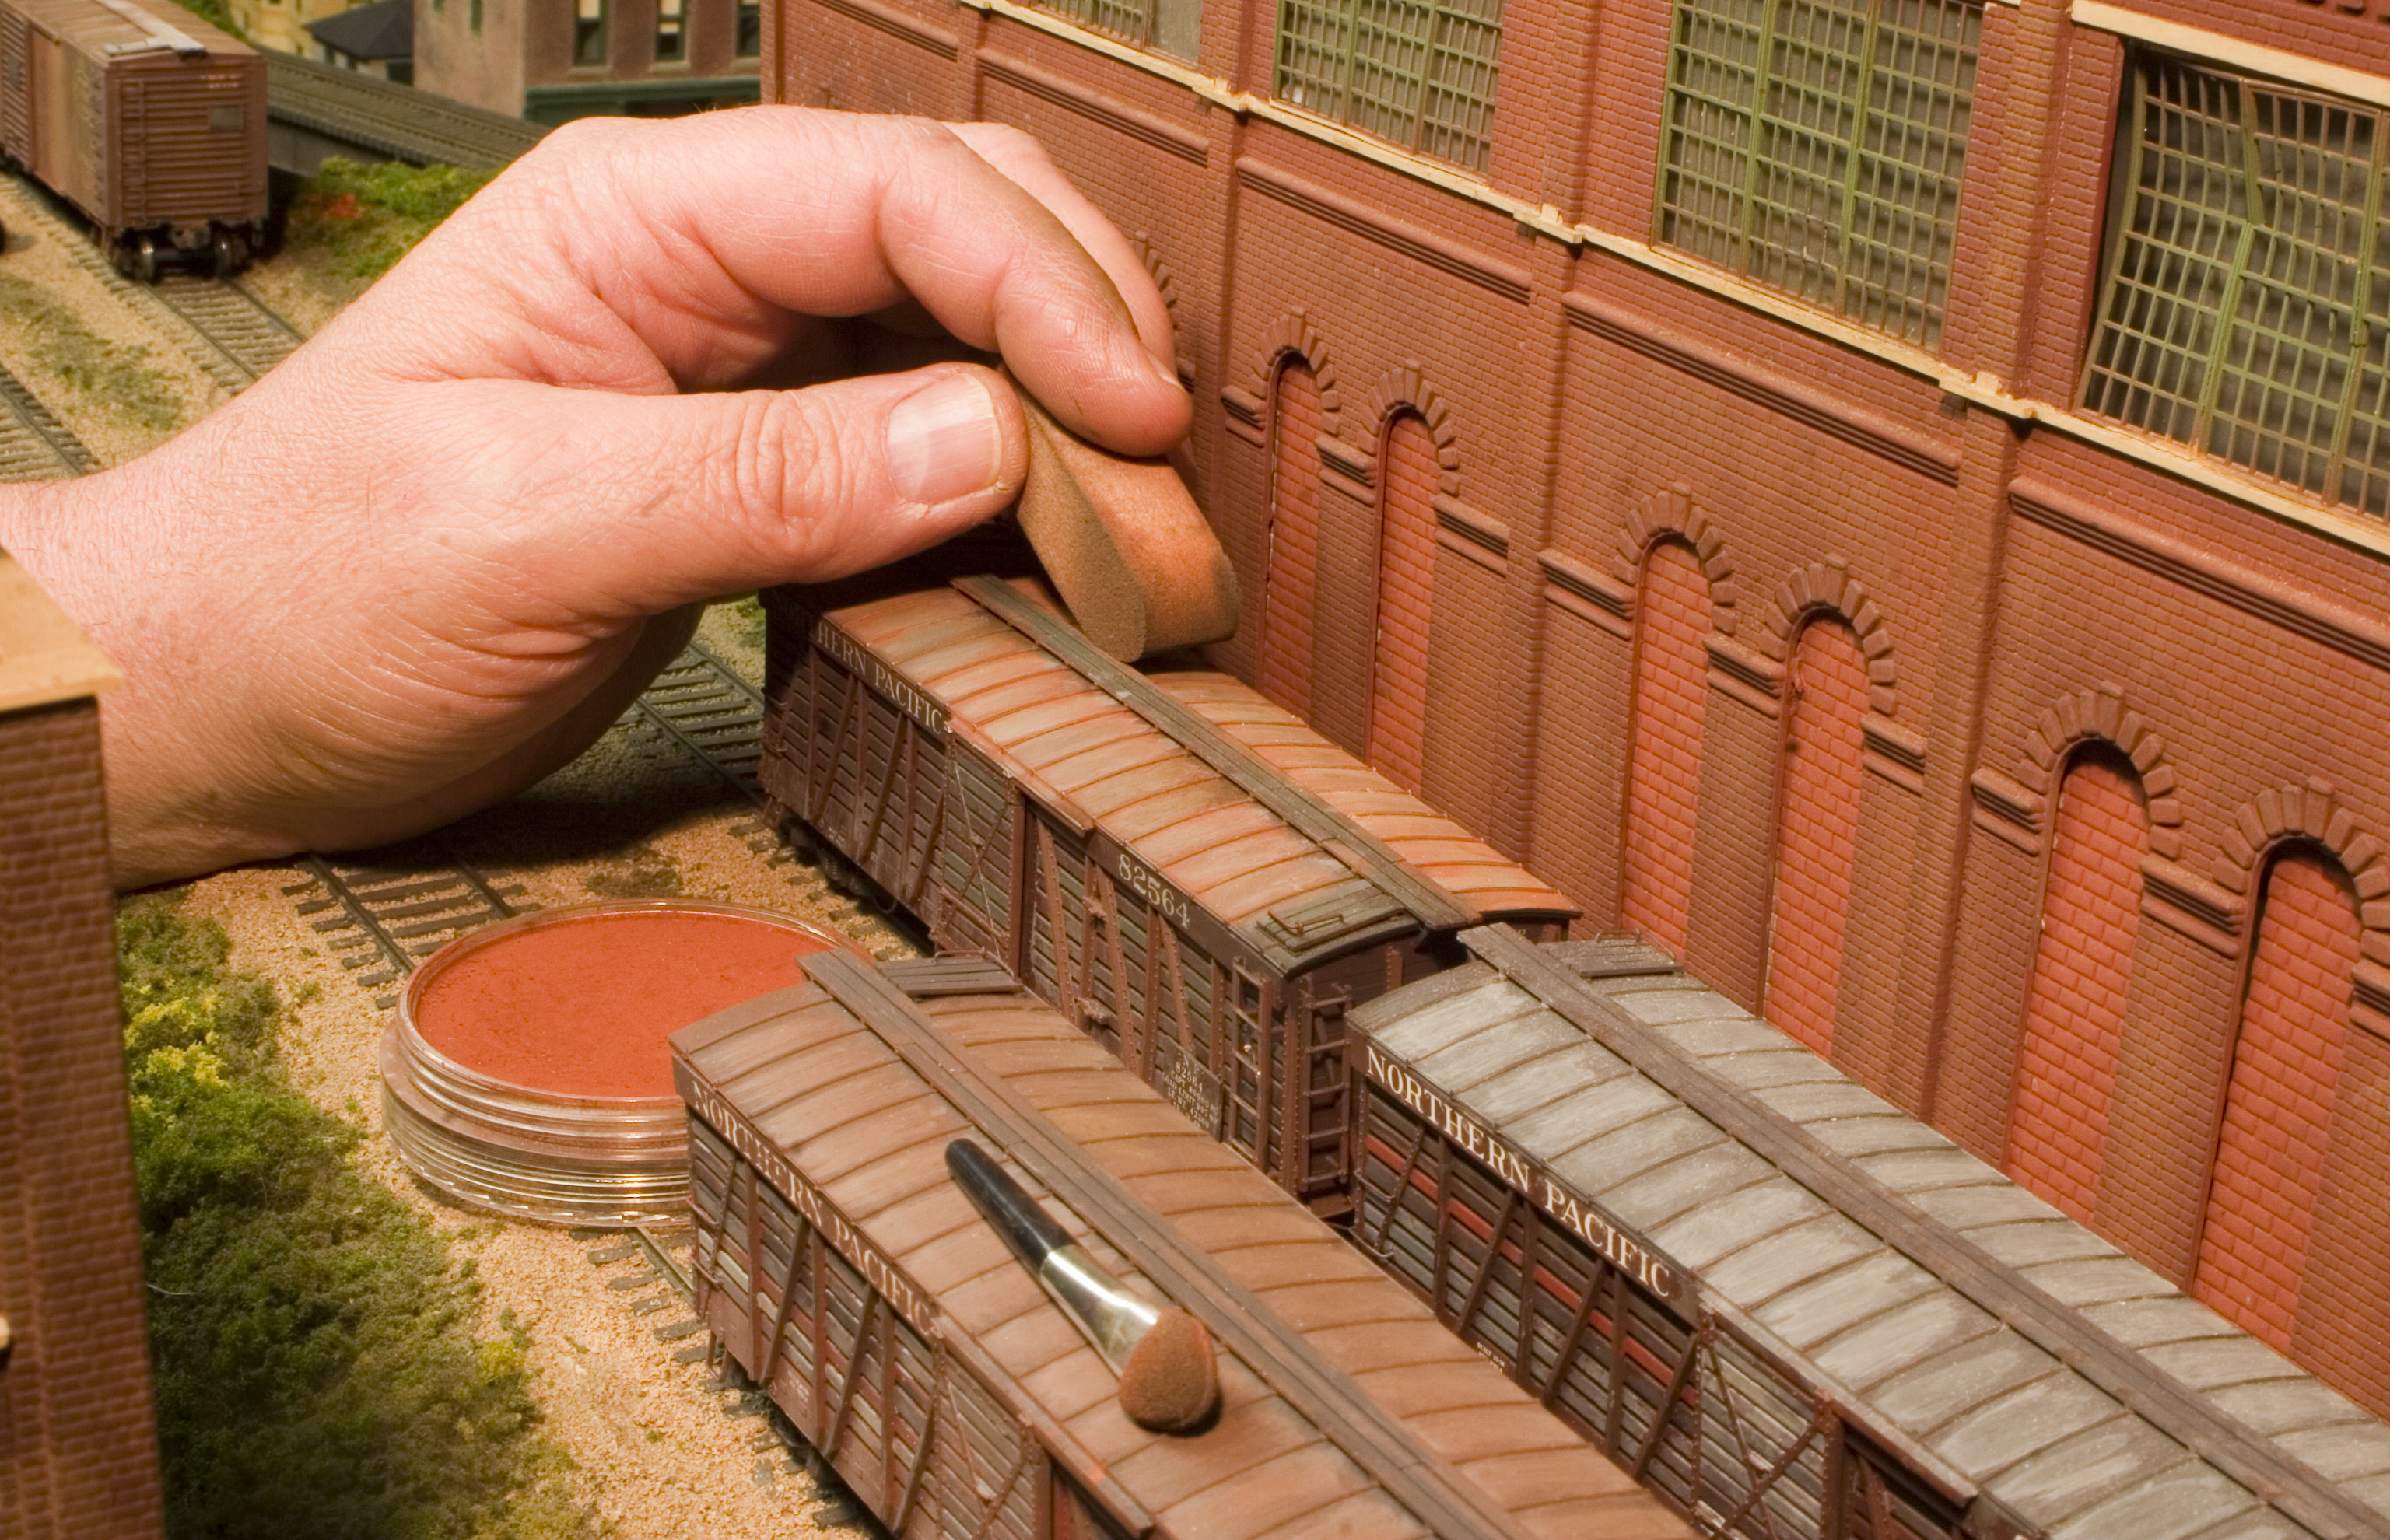
Let’s apply a basic weathering color to the side of a car.

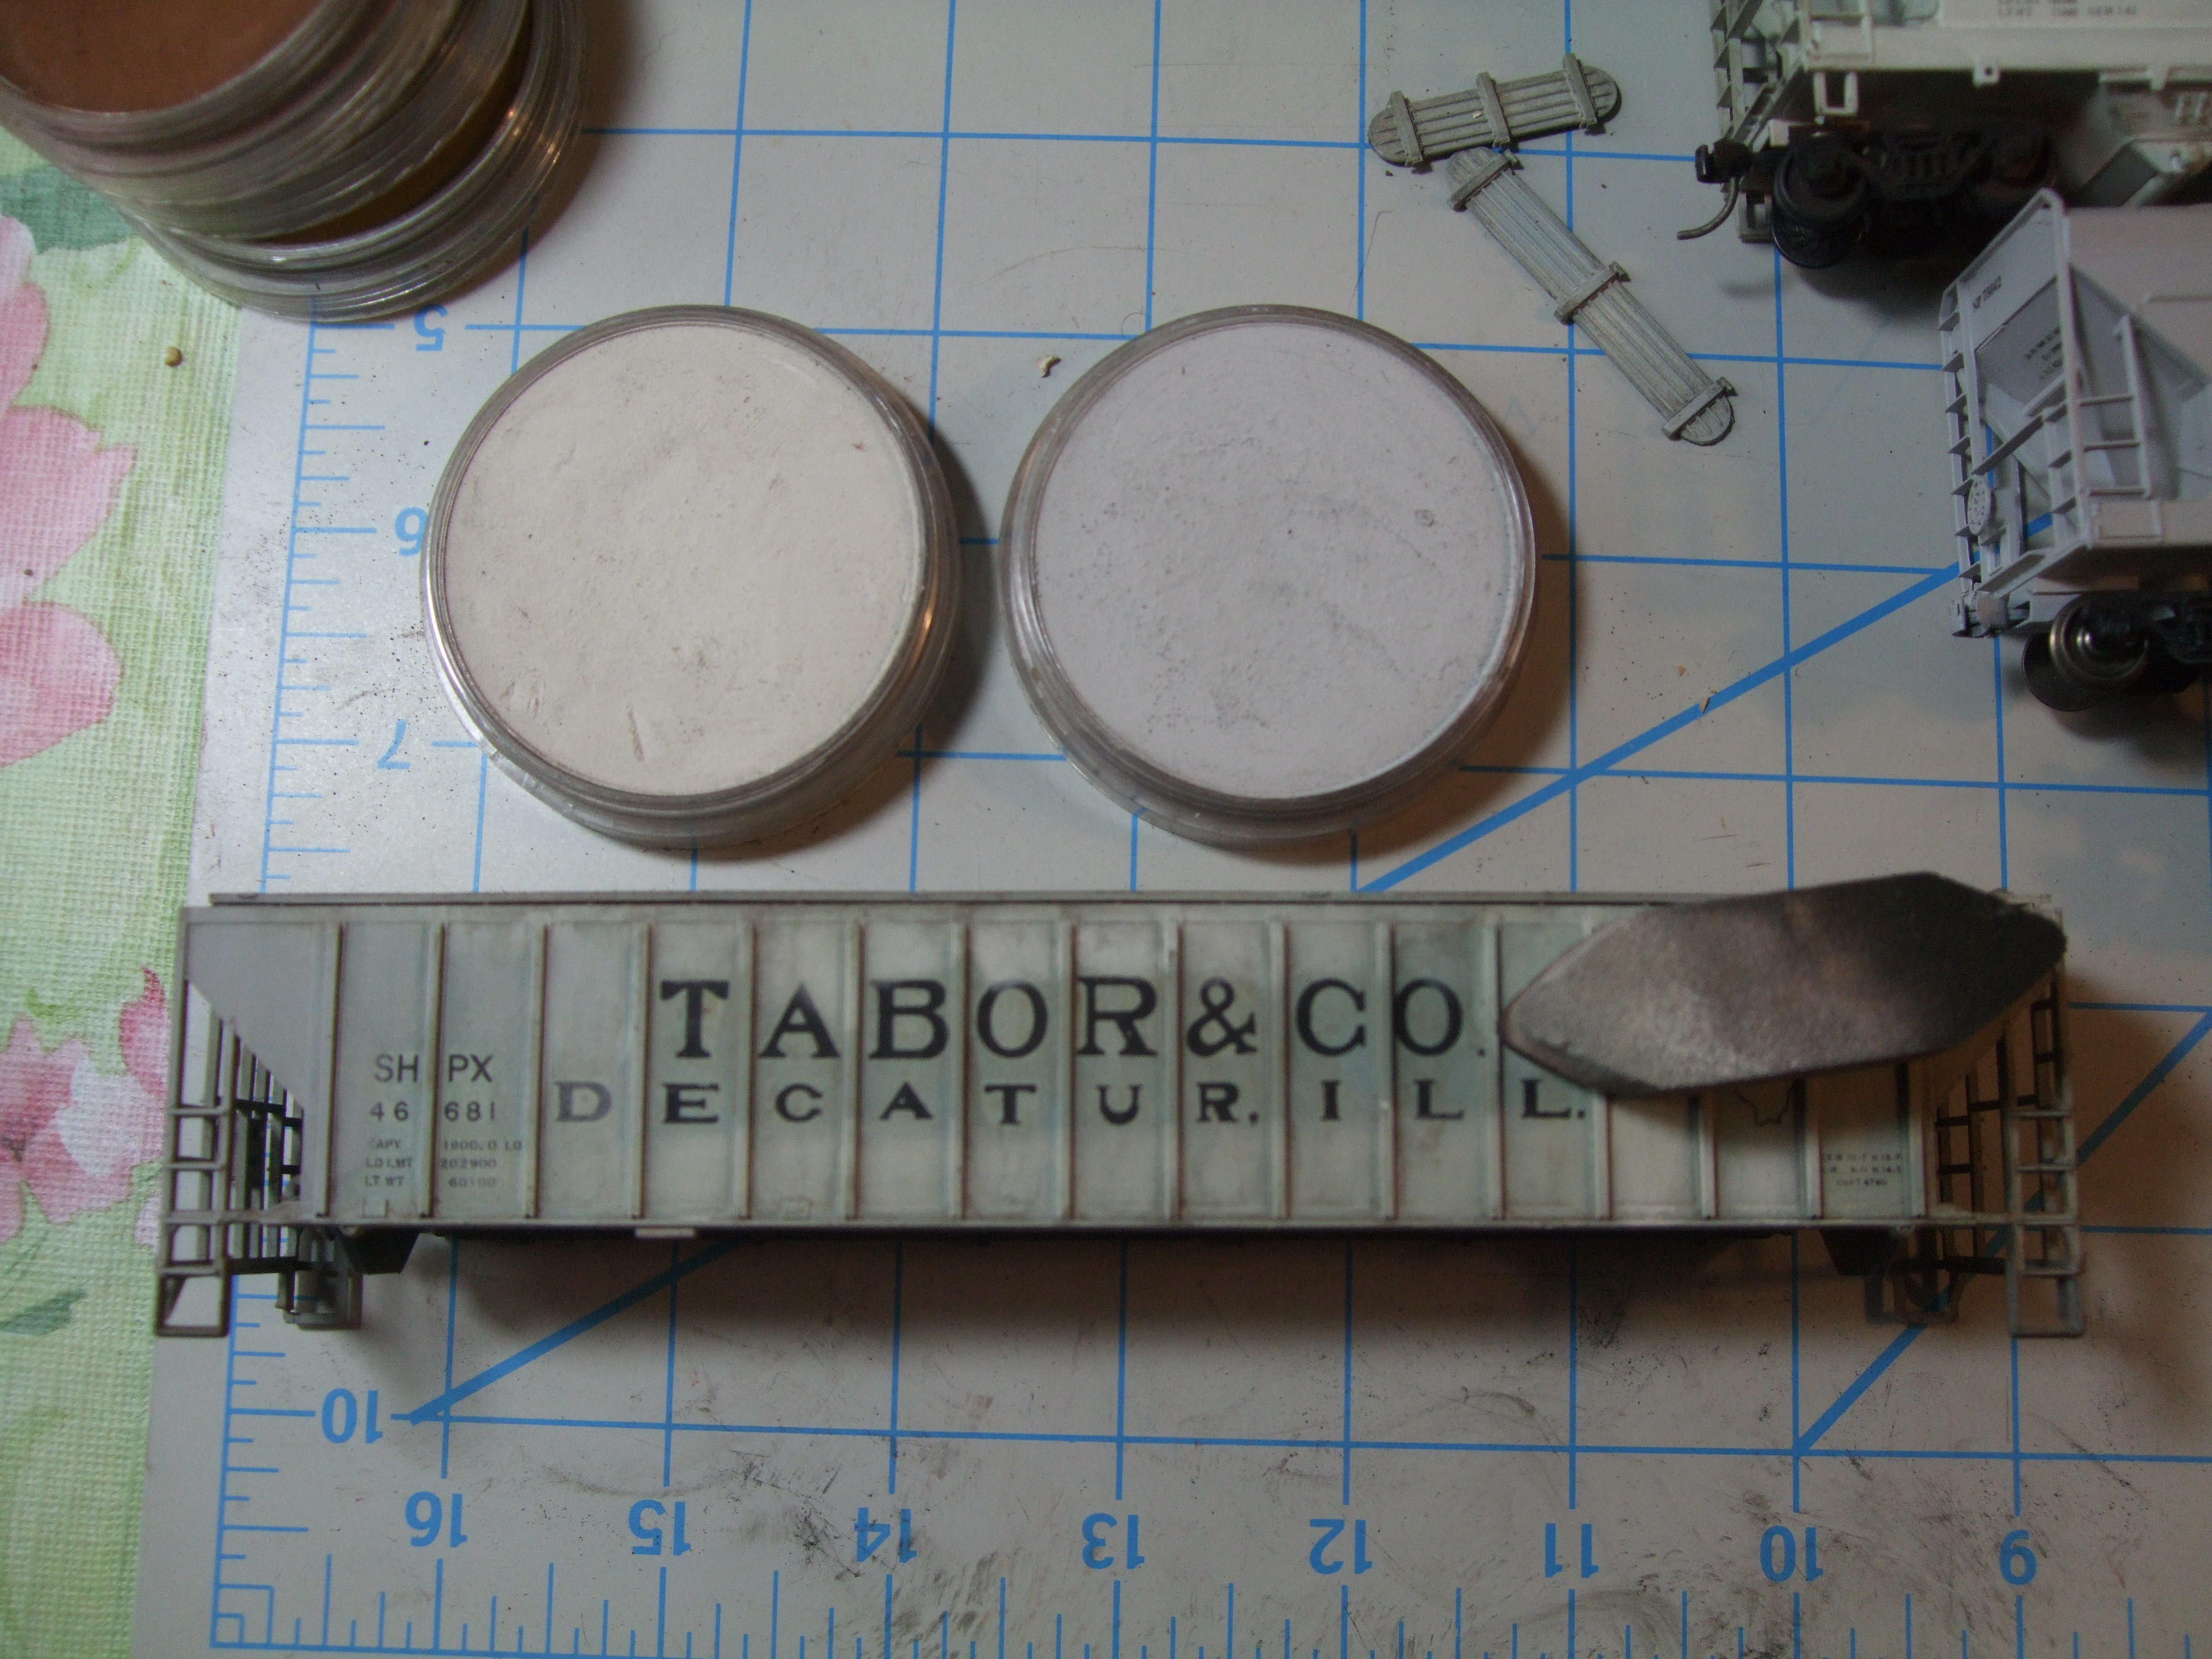
Firstly, use the Sofft Tools. Plain and simple, they work. Cheap make up sponges are just that. They shred and have no definition. The Sofft Tools can be used with a high degree of precision and they are washable and reusable. We’ll get into this in more detail later.

Blog_1_Finger_Pressure2

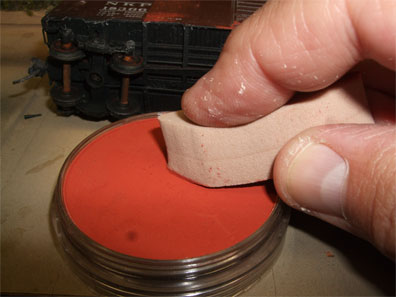
Pick your Sofft Tool, wipe the pan color with it using light pressure.

Blog_1_Get_Color_5

Don’t drag it so hard as to generate dust. If you get dust then next loading just dab the color on the tool.

Blog_1_Apply_4

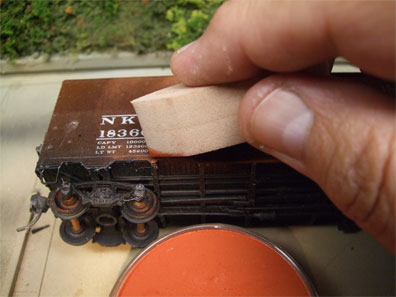
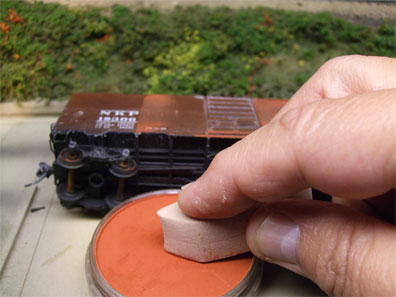
Wipe the color on to the side or roof with some finger pressure.

Blog_1_Apply_3

The harder you press the better it bonds to the flat finish. I’ve seen modelers lightly touch the surface like it will break something.

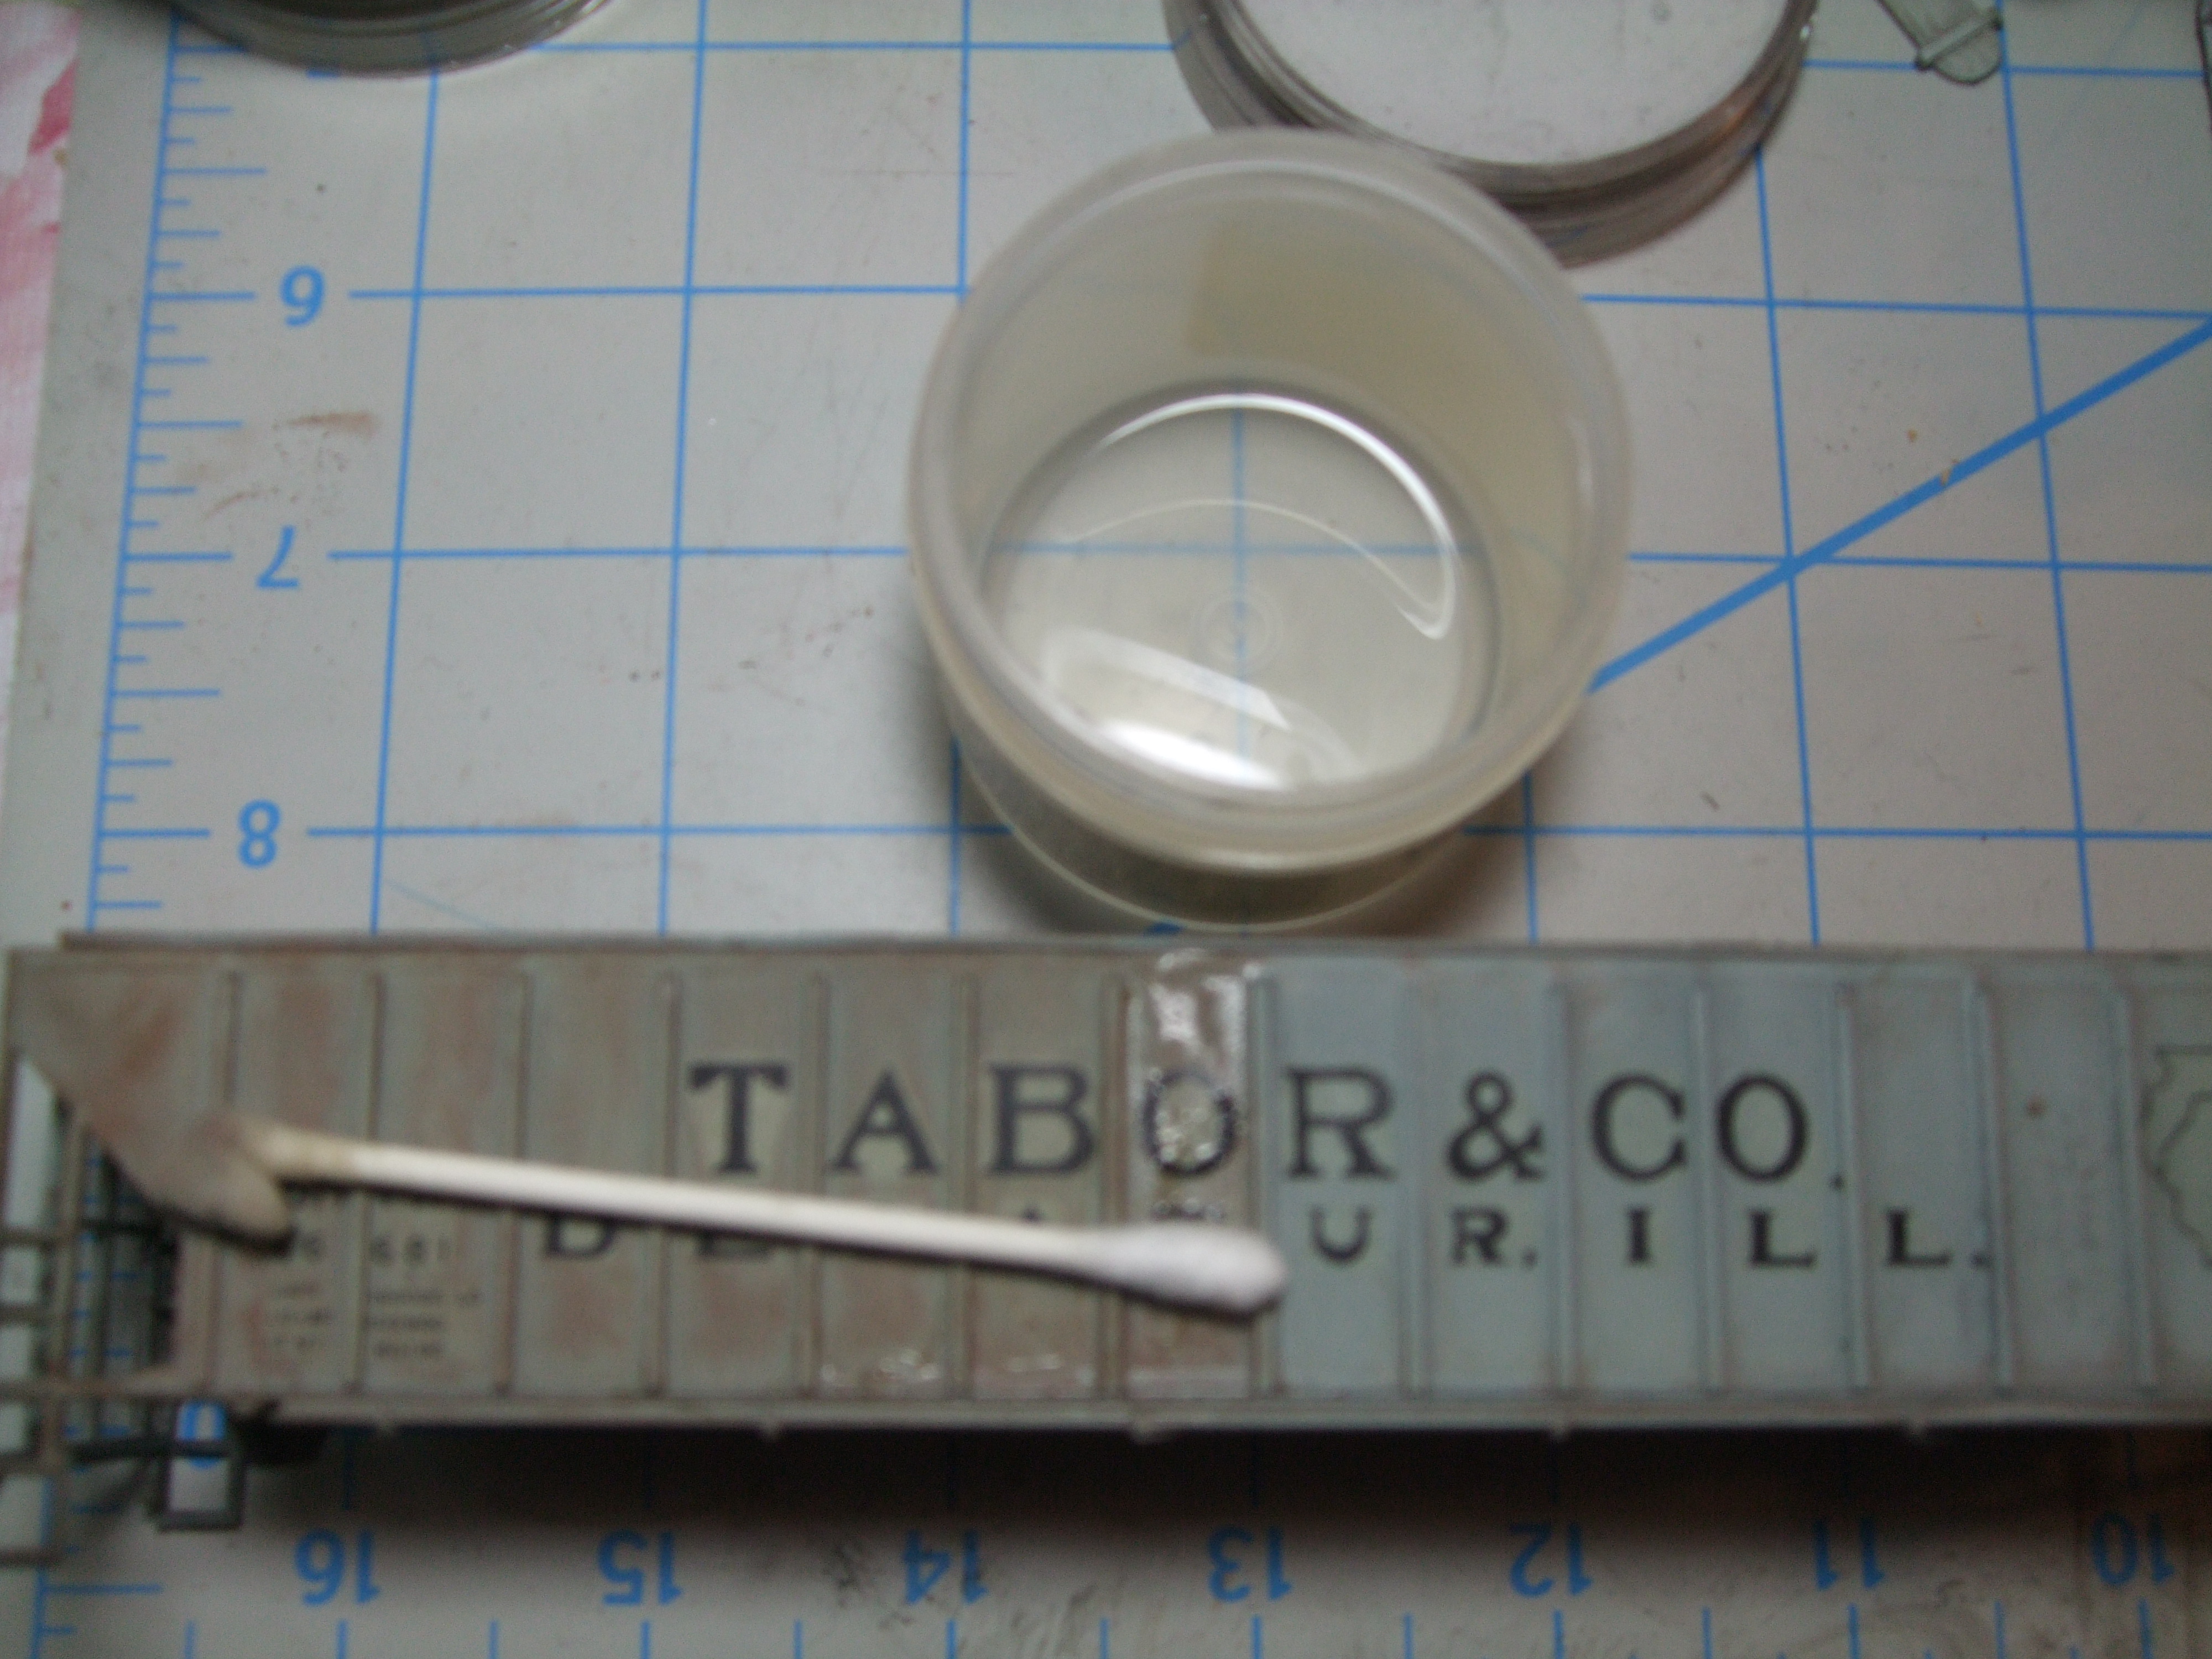
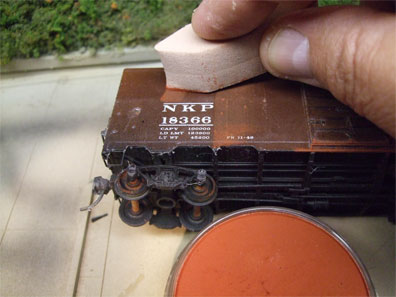
If you lay down too much color, try blending it down with the tool or paper towel. If you use the Magic Rub White eraser too much, you’ll polish the flat surface and have to spray more flat back on. And if you mess up, you can always wash it off with Dawn® dish detergent.

Well, this is our first installment. I hope this and the Fun Fact Tips sheet available here answers some of your questions.

We’ll get to more topics and more advanced techniques as we continue. Well it’s time to go back to the basement and get some projects finished for the upcoming show.

Remember, “The best modeling is done at 3 a.m. the night before a show.” —- Rob

Rob Manley

Images supplied by: Rob Manley and David Allenson